For most electronics kits, a thin rosin-core solder is the easiest choice. Learn when to choose 63/37 leaded solder, lead-free solder, different diameters, and no-clean or water-soluble flux.
What do you need help with?
Open an answer, or tell us what we should cover next.
Answered in this guide
Choose the best solder for an electronics kit
For most kits, use thin electronics-grade rosin-core solder. Choose 63/37 tin-lead solder when permitted, or SAC305 lead-free solder when lead restrictions or the kit require it.
63/37 tin-lead solder is easier for learning because it melts at a lower temperature and solidifies quickly. Lead-free solder is appropriate when required, but generally needs more heat and careful technique.
Use about 0.5–0.8 mm solder for most electronics kits, with thinner solder helping on small joints. Choose rosin, rosin-activated, or no-clean electronics flux rather than acid-core solder.
Match solder to through-hole, surface-mount, or wire work
Use roughly 0.5–0.8 mm solder for common kit work, choosing a manageable diameter for the joint size. The alloy can be 63/37 when allowed or a suitable lead-free type when required.
Requests help us prioritize the next guide. No email required.
One anonymous request per topic.
Best solder for electronics kits
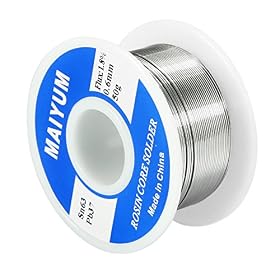
For most electronics kits, the easiest solder to work with is a thin rosin-core solder made for electronics, not plumbing solder. A 63/37 tin-lead alloy in approximately 0.5–0.8 mm diameter is forgiving for beginners and melts predictably. If the kit, workspace, school, or local rules require lead-free materials, choose a lead-free electronics solder such as SAC305 instead.
The right solder affects how easily you can heat a joint, how much solder you apply, and how cleanly the finished connection looks. Alloy, diameter, and flux type matter more than buying the largest spool or the solder with the highest stated melting temperature.
Quick recommendations
Best general-purpose choice: 63/37 tin-lead rosin-core solder, about 0.6 mm or 0.7 mm diameter, when leaded solder is permitted.
Best lead-free choice: SAC305 or another electronics-specific lead-free alloy with a no-clean or rosin flux core.
Best for very small pads and surface-mount work: approximately 0.3–0.5 mm solder.
Best for larger through-hole wires and terminals: approximately 0.8–1.0 mm solder.
Avoid: acid-core solder, plumbing solder, solder intended for stained glass, and solder with no clearly stated electronics flux or alloy.
What to look for in solder for an electronics kit
Electronics-grade flux core
Choose solder with a rosin, rosin-activated, or no-clean flux core intended for electronics. The flux helps remove surface oxidation so molten solder can bond to the component lead and circuit-board pad.
Do not substitute acid-core plumbing solder. Its flux can be corrosive and is not appropriate for ordinary electronic circuit boards. Also avoid relying on separate plumbing flux unless the component or board manufacturer specifically calls for it.
A suitable diameter
Solder diameter determines how much solder is delivered each time you touch the wire to the joint.
0.3–0.5 mm: useful for small pads, fine wires, and surface-mount components. It reduces the chance of flooding a small joint.
0.5–0.8 mm: a practical range for most beginner electronics kits and through-hole components.
0.8–1.0 mm: useful for larger terminals, heavier wires, and bigger through-hole connections, but easier to overfeed on small pads.
If you are unsure, around 0.6 mm or 0.7 mm is a versatile starting point for typical kits.
A spool size that matches the work
A small spool is usually enough for occasional kit building. A larger spool makes sense if you regularly assemble boards, but solder can oxidize or become dirty if stored carelessly. Keep the spool dry, covered, and labeled with its alloy and flux type.
Product prices and availability are accurate as of the date/time indicated and are subject to change. Any price and availability information displayed on Amazon.com at the time of purchase will apply to the purchase of this product.
Leaded versus lead-free solder
63/37 tin-lead solder
63/37 solder contains 63% tin and 37% lead. It is popular for learning because it melts at a relatively low temperature and transitions quickly from liquid to solid. That quick transition can make it easier to form neat joints without disturbing the connection while it cools.
Advantages include:
Easier handling for many beginners
Lower working temperature than common lead-free alloys
Smooth flow when the tip and joint are properly heated
Good availability in fine diameters
The main disadvantage is lead exposure. Do not eat or drink while soldering, wash your hands afterward, keep solder away from children and pets, and avoid creating dust or residue around food-preparation areas. Use ventilation or fume extraction, and follow the solder manufacturer's safety guidance.
60/40 tin-lead solder
60/40 solder contains 60% tin and 40% lead. It is also widely used for electronics and is generally easy to work with. Compared with 63/37 solder, it has a small plastic or semi-liquid range as it cools, so a joint should not be moved until it has solidified.
For a beginner kit, either 60/40 or 63/37 can work well when leaded solder is allowed. The 63/37 alloy is often preferred for its more abrupt solidification.
Lead-free solder
Lead-free electronics solder is the appropriate choice when required by the kit instructions, workplace policy, school rules, or local regulations. SAC305 is a common lead-free alloy, although other tin-based formulations are also available.
Lead-free solder generally requires more heat and may need a little more time for the joint to reach proper soldering temperature. It can also be less forgiving when the iron is underpowered, the tip is oxidized, or the board and component are not held steady.
When using lead-free solder:
Use the temperature range recommended by the solder and soldering-station manufacturers.
Keep the tip clean and properly tinned.
Heat the pad and component lead together rather than melting solder only on the iron tip.
Allow the joint to cool without movement.
Inspect the joint for complete wetting and a secure mechanical connection.
Do not automatically raise the temperature far above the manufacturer's guidance. Excessive heat can lift PCB pads, damage components, and oxidize the tip.
Product prices and availability are accurate as of the date/time indicated and are subject to change. Any price and availability information displayed on Amazon.com at the time of purchase will apply to the purchase of this product.
Rosin-core, no-clean, and water-soluble flux
Rosin-core solder
Rosin-core solder is a conventional choice for electronics. Its residue may remain visible after soldering and can often be cleaned with an appropriate electronics-grade solvent if the board instructions permit cleaning.
No-clean solder
No-clean solder leaves a smaller or less troublesome residue under normal conditions. “No-clean” does not mean the residue is always invisible or that cleaning is never allowed. If the board will be coated, inspected, or used in a particularly clean application, follow the flux manufacturer's instructions.
Water-soluble flux
Water-soluble flux can provide strong cleaning action, but its residue generally must be removed thoroughly with water or the specified cleaning method. Do not leave water-soluble flux residue on a board simply because the soldering is complete; residue can remain electrically or chemically problematic.
For a basic kit, rosin-core or no-clean electronics solder is usually simpler than water-soluble flux solder.
Product prices and availability are accurate as of the date/time indicated and are subject to change. Any price and availability information displayed on Amazon.com at the time of purchase will apply to the purchase of this product.
Choosing the right solder for common kit work
Through-hole resistor, capacitor, and header kits
Use approximately 0.5–0.8 mm electronics solder. A 63/37 alloy is easy to control when permitted, while a lead-free alloy is suitable when required. Avoid very thick solder because it can quickly fill small plated holes and create bridges between nearby pads.
Small surface-mount kits
Choose a finer diameter, often around 0.3–0.5 mm. Fine solder lets you add small amounts gradually. You may also need a compatible liquid or gel flux, particularly when working with oxidized parts or closely spaced pads.
Wires and larger terminals
For heavier wires, battery leads, switches, or large terminals, approximately 0.8–1.0 mm may be more convenient. The joint still needs to be heated correctly; using thicker solder does not compensate for an iron tip that cannot transfer enough heat.
Product prices and availability are accurate as of the date/time indicated and are subject to change. Any price and availability information displayed on Amazon.com at the time of purchase will apply to the purchase of this product.
How to make better solder joints
Secure the board and component. Movement during cooling can create a dull, cracked, or unreliable joint.
Clean and tin the tip. A thin coating of fresh solder helps transfer heat.
Heat both surfaces. Touch the tip to the pad and component lead at the same time.
Feed solder to the joint. Do not use the iron as a melting dish for a blob of solder.
Stop when the joint is filled. More solder is not automatically stronger and can bridge neighboring pads.
Remove solder, then the iron, or follow the station's recommended technique. Let the joint cool without moving it.
Inspect the result. Look for a smooth connection that wets both the pad and lead, with no unintended bridge.
A joint that will not accept solder may need a cleaner tip, fresh flux, more even heating, or removal of oxidation. Increasing temperature alone is often the wrong fix.
Common buying mistakes
Buying solder without checking the alloy
A spool may say “electronics solder” without making the alloy obvious in the product description. Check whether it is leaded or lead-free and confirm that the choice matches the kit and workspace requirements.
Choosing solder that is too thick
Thick solder is harder to control on small pads. For most beginner kits, a medium-fine diameter is more useful than heavy-gauge solder.
Choosing acid-core solder
Acid-core solder is designed for different materials and applications. It is not the normal choice for circuit boards and electronic components.
Assuming no-clean means residue-free
No-clean flux can still leave visible residue. Clean only with a method compatible with the board, components, and flux manufacturer's instructions.
Ignoring storage and age
Solder itself can remain usable for a long time, but the flux inside the wire and the outside of the spool can become contaminated. Keep it sealed and replace solder that is visibly dirty, heavily oxidized, or consistently fails to wet clean surfaces.
When to replace the solder or change the approach
Replace the spool if fresh solder will not wet a properly cleaned and heated joint, if the wire is contaminated, or if the flux behaves inconsistently. Before discarding it, verify that the soldering iron reaches the recommended temperature, the tip is in good condition, and the pad and component lead are clean.
If joints repeatedly fail despite suitable solder and correct technique, the problem may be the iron, tip, board, or component rather than the solder. Check the kit instructions and soldering-station guidance. Stop if a board pad begins to lift, a component overheats, or insulation starts to melt, and seek qualified assistance for equipment or electrical problems.
Bottom line
For a typical electronics kit, start with 0.6–0.7 mm rosin-core electronics solder. Choose 63/37 tin-lead if it is permitted and you can follow sensible lead-safety practices. Choose a suitable lead-free alloy such as SAC305 when required. For tiny surface-mount work, move down to a finer diameter; for large wires and terminals, move up slightly.
FAQ
What is the best solder diameter for electronics kits?
Approximately 0.5–0.8 mm works well for most beginner electronics kits. Around 0.6 or 0.7 mm is a versatile starting point for through-hole components. Use finer solder for small surface-mount pads and thicker solder for larger wires or terminals.
Is 63/37 solder better than 60/40 for electronics?
Both can work well for electronics when leaded solder is permitted. 63/37 transitions quickly from liquid to solid, which can make it easier to avoid movement-related defects. 60/40 is also widely used but has a small semi-liquid range as it cools.
Should I use lead-free solder for an electronics kit?
Use lead-free solder when the kit instructions, school, workplace, or local requirements call for it. SAC305 and other tin-based lead-free electronics alloys are common choices. Lead-free solder generally needs better heat control than leaded solder.
Can I use plumbing solder on a circuit board?
Do not use acid-core plumbing solder on ordinary circuit boards. Choose rosin-core, no-clean, or another electronics-specific flux-core solder instead.
Do I need separate flux when using flux-core solder?
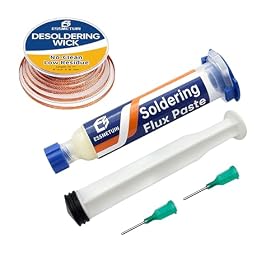
Not always. Fresh electronics solder with a suitable flux core is enough for many kit joints. Separate compatible flux can help with oxidized parts or fine surface-mount work, but follow the flux manufacturer's cleaning instructions.