Quick answer
For general hobby electronics, leaded solder—especially a eutectic 63/37 alloy—is usually easier to learn with. It melts at a lower temperature, flows readily, and changes from liquid to solid quickly, which helps produce clean joints.
Lead-free solder is the better choice when you want to avoid lead, are building something that may be handled frequently by children or consumers, need to follow RoHS-style material requirements, or want to practice the techniques used in modern commercial electronics. It generally requires more heat and better temperature control.
Neither option is automatically safer to use carelessly. Lead-free solder still requires good ventilation and hand washing because flux fumes and contaminated surfaces are concerns.
Lead-free and leaded solder compared
| Feature | Leaded solder | Lead-free solder |
|---|---|---|
| Typical hobby alloys | 63/37 tin-lead or 60/40 tin-lead | SAC alloys, such as tin-silver-copper formulations |
| Melting behavior | Lower temperature; 63/37 melts at about 183°C | Higher temperature; many common SAC alloys melt around 217–227°C |
| Ease of use | Usually easier for beginners | More demanding of heat, tip condition, and technique |
| Joint appearance | Often shiny when properly formed, depending on flux and lighting | Can look dull or grainier even when sound |
| Wetting | Generally forgiving | May need more heat, flux, or contact time |
| Health concern | Lead contamination requires strict hygiene | Avoids lead but does not eliminate flux and hot-metal hazards |
| Typical use | Hobby repair, learning, prototypes, legacy equipment | New products, RoHS-style work, and lead-avoidance projects |
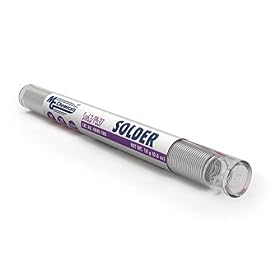
The alloy matters more than the label alone. Check the spool for its alloy composition, melting range, diameter, and flux type before setting your iron temperature.
Why leaded solder is easier for hobby work
Leaded solder transfers heat efficiently and melts at a relatively low temperature. A 63/37 tin-lead alloy is eutectic, meaning it changes sharply between liquid and solid at approximately 183°C rather than passing slowly through a broad plastic range. That quick transition can reduce the chance of disturbing a joint as it cools.
A common 60/40 alloy melts over a small temperature range rather than at one exact point. It is still widely used for hobby work, but the joint should remain still while it solidifies.
Leaded solder is often a practical learning material because it:
- Flows onto copper pads and component leads readily.
- Needs less heat than many lead-free alloys.
- Makes it easier to solder small joints without prolonged heating.
- Works well with many general-purpose rosin-core flux formulations.
- Is usually more forgiving when using a modest soldering iron.
The main drawback is lead contamination. Do not eat, drink, smoke, or touch your face while soldering. Wash your hands after handling solder, clean the work surface, and keep soldering materials away from food areas. Follow local disposal rules for solder scraps and contaminated wipes.
Why choose lead-free solder
Lead-free solder avoids adding lead to the project and workspace. It is the appropriate choice when a product must meet a lead-restriction requirement, when the finished item will be handled by children, or when you want to follow current commercial assembly practices.
Most common lead-free electronics solder uses a tin-based alloy with additions such as silver and copper. These alloys generally melt at higher temperatures than tin-lead solder. They may also need more time to wet a pad and component lead, especially if the joint is large or the copper area conducts heat away quickly.
Lead-free solder can work well for hobbyists, but it places greater demands on the setup:
- Use an iron with enough temperature stability and thermal recovery.
- Select a tip large enough to transfer heat without being unnecessarily large.
- Keep the tip clean and properly tinned.
- Add flux when the solder does not wet the surfaces promptly.
- Avoid holding the iron on a pad for too long, since higher temperatures can damage lifted pads, plastic connectors, and sensitive components.
A dull-looking lead-free joint is not automatically defective. Judge the joint by its shape, wetting, connection strength, and absence of cracks or solder bridges rather than shine alone.
Which solder is better for a beginner?
Leaded 63/37 solder is generally the least frustrating starting point for through-hole practice and basic repairs, provided you can use it responsibly. Its lower melting point and quick solidification make it easier to see how heat, solder feed, and joint movement affect the result.
Choose lead-free from the beginning if:
- You cannot maintain lead-safe hygiene in your workspace.
- Your project instructions require lead-free materials.
- The finished project will be used by children or frequently handled.
- You want to build habits that match lead-free production work.
- You already have an iron with stable temperature control and adequate heat recovery.
For either type, a thin electronics solder is usually easier for small circuit boards than thick solder intended for heavy wire or plumbing. A diameter around 0.6–0.8 mm is often convenient for general through-hole work, while smaller surface-mount work may benefit from thinner solder. The best diameter depends on pad size and your technique.
Flux matters as much as the alloy
Solder will not reliably bond to oxidized metal just because the iron is hot. The flux helps remove surface oxides and allows molten solder to wet the pad and lead.
For electronics, use solder labeled for electronics work, typically with a rosin or other electronics flux core. Do not use acid-core plumbing solder on circuit boards; its residue can remain corrosive and damage the assembly.
Common flux labels include:
- Rosin core: Effective for many electronics jobs but may leave visible residue.
- No-clean: Designed to leave a smaller or less troublesome residue under specified conditions. “No-clean” does not mean the residue should be eaten, spread onto skin, or ignored in every application.
- Water-soluble: Can be active and effective, but residues normally require the cleaning process specified by the flux manufacturer.
If lead-free solder refuses to spread over a clean pad, adding a small amount of compatible electronics flux is often more useful than simply turning up the iron. Excessive temperature can damage the board while failing to solve contamination or poor contact.
Temperature and equipment considerations
Do not choose an iron temperature solely from the solder’s melting point. The iron must be hot enough to transfer heat into the joint, but the setting also depends on the tip size, joint mass, board construction, and heat-sensitive parts.
As a general starting principle, lead-free work often needs a higher iron setting than leaded work. Use the solder and station manufacturer’s guidance, then adjust conservatively based on how quickly the joint heats and wets. A temperature-controlled station is preferable for repeated electronics work because it helps maintain a consistent tip temperature.
A larger chisel or bevel tip can transfer heat more effectively than a very small pointed tip. The tip should contact both the pad and the component lead. Applying solder to the heated joint—not only to the tip—helps form a reliable connection.
Stop and reassess if:
- The pad lifts from the board.
- The board darkens or blisters.
- Insulation or a connector begins to soften.
- Solder balls up instead of wetting the copper.
- You need to hold the iron on the joint for an unusually long time.
Safety differences and shared precautions
Leaded solder has a specific contamination hazard, while lead-free solder does not make soldering risk-free. Both types involve hot tools, molten metal, flux fumes, sharp component leads, and possible fire hazards.
Use these precautions for either solder type:
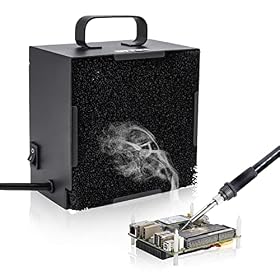
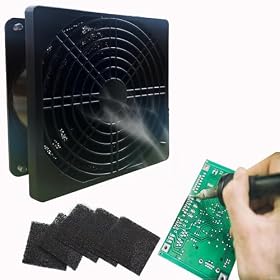
- Provide local ventilation or use a suitable fume extractor positioned near the work area.
- Avoid breathing directly over the joint or directing fumes toward your face.
- Wear eye protection when trimming leads or working with solder that may splatter.
- Keep the iron in a stable stand and remove flammable materials from the work area.
- Wash your hands after soldering, especially before eating or handling food.
- Keep solder, flux, scraps, and tools away from children and pets.
- Follow the solder and flux safety data sheets for additional handling and cleanup guidance.
For leaded solder, use a dedicated work surface if possible and clean surfaces regularly. A fume extractor mainly addresses airborne flux smoke; it does not remove lead residue from hands or benches.
Common problems and what to change
Solder will not wet the pad
First confirm that the pad and lead are actually being heated together. Clean and tin the tip, touch it to both surfaces, and apply a small amount of solder to the joint. If the solder still beads up, the surfaces may be oxidized or contaminated. Add compatible electronics flux and inspect the tip condition.
Do not compensate indefinitely by increasing temperature. A damaged tip, insufficient tip size, contaminated copper, or a poor mechanical connection may be the real problem.
The joint looks dull or grainy
With leaded solder, a dull or irregular joint can indicate movement while the solder was solidifying, insufficient heating, contamination, or inadequate flux. Reheat the joint briefly and allow it to cool without movement.
With lead-free solder, a less shiny appearance may be normal. Look for proper wetting and a smooth connection to both the pad and lead rather than relying only on gloss.
Solder bridges adjacent pads
Use less solder, a smaller amount of flux, or a tip suited to the pad spacing. Remove excess solder with solder wick or a suitable desoldering tool, then inspect the area carefully. Do not drag a large blob across fine-pitch pins without a plan for removing the excess.
The board pad lifts
Stop heating and let the area cool. Excessive dwell time, repeated rework, mechanical pulling, or high temperature can weaken the bond between a copper pad and the circuit board. If the pad is damaged, the repair may require a jumper wire or board-level repair technique rather than more solder.
Bottom line
Choose leaded 63/37 solder when ease of use is the priority and you can maintain strict hygiene and safe handling. Choose lead-free solder when avoiding lead or following lead-free project requirements matters more than having the most forgiving learning experience.
Whichever alloy you choose, buy electronics-grade solder with a clearly identified alloy and flux type, use a temperature-controlled iron, keep the tip clean and tinned, and ventilate the work area. Good joint technique and surface preparation usually matter more than chasing a particular finish or solder brand.