For most through-hole electronics kits, choose a temperature-controlled soldering station with interchangeable tips and enough power to heat component leads and the board without prolonged contact.
For most through-hole electronics kits, a temperature-controlled soldering station is the easiest choice. Look for adjustable temperature, interchangeable tips, a comfortable lightweight iron, and enough power to recover heat when soldering larger joints. A basic plug-in iron can work for occasional kits, but temperature control makes the process more consistent and reduces the risk of damaging pads or components.
What to look for
Adjustable temperature control
Temperature control is more useful than simply choosing the highest wattage. It lets you set a moderate temperature for ordinary joints and adjust it for lead-free solder, larger ground connections, or boards that absorb more heat.
Use the solder and kit instructions as your starting point. Lead-free solder generally requires more heat than traditional leaded solder, while excessive heat or holding the iron on a joint too long can lift pads, damage components, or discolor the circuit board.
A station with a clearly marked control or digital adjustment is preferable to an iron that only has one fixed temperature. Avoid changing settings constantly without a reason; consistent technique and the correct tip often matter as much as the selected temperature.
Enough power for heat recovery
Wattage does not directly tell you the tip temperature. It indicates how much electrical power the iron can use to maintain or restore heat. For through-hole kits, a modest-to-medium powered temperature-controlled station is usually adequate. Additional power is helpful when soldering ground planes, thick wires, switches, connectors, or other joints that draw heat away from the tip.
A higher-powered station is not automatically more dangerous. With proper temperature control, it can recover quickly without needing to run continuously at an excessive temperature. The important factors are controlled temperature, a suitable tip, and sensible contact time.
Interchangeable tips
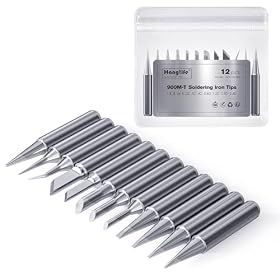
Choose an iron that accepts replacement tips in several shapes and sizes. Through-hole kits usually benefit from:
- Small chisel tip: A versatile starting tip that transfers heat well and can handle most component leads.
- Medium chisel tip: Useful for larger terminals, wires, and ground connections.
- Fine conical or pointed tip: Helpful for crowded areas, though it transfers less heat and can make larger joints slower.
A small chisel tip is often easier for beginners than an extremely fine pointed tip. It provides more contact area while still fitting between typical through-hole components. Tip compatibility is important because replacement tips should be easy to find and appropriate for the specific iron.
A comfortable iron and flexible cord
Through-hole assembly may involve many joints, so a lightweight handpiece and flexible lead can reduce hand fatigue. The grip should remain comfortable when held close to the work without placing your fingers near the hot section.
A stable stand is also important. It should hold the iron securely and keep the hot tip away from the work surface. Some stands include brass wool or a damp sponge for tip cleaning; either can be suitable when used according to the tip manufacturer's care instructions.
Solder and flux matter too
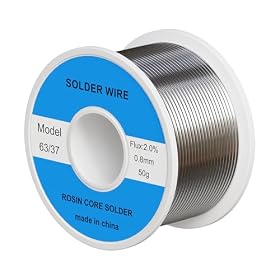
The iron cannot compensate for unsuitable solder or a dirty board. Use electronics solder rather than plumbing solder. Choose the solder alloy and diameter that match the kit instructions and your experience.
Thinner solder is generally easier for small through-hole joints because you can add a controlled amount. Thicker solder may be useful for large terminals but can quickly create oversized joints on small pads.
Flux helps solder wet clean metal surfaces and flow around the lead and pad. Many electronics solders contain a flux core, but additional electronics-safe flux can help with oxidized or stubborn joints. Do not use acid-core plumbing flux on electronic assemblies.
Soldering iron or soldering station?
A temperature-controlled station is best for regular kit building
Choose a station if you expect to build more than one kit, work with both leaded and lead-free solder, or want easy tip replacement and better control. A station also keeps the control electronics and power supply separate from the handpiece, which can make the iron more comfortable to handle.
A basic iron can suit occasional use
A fixed-temperature iron may be sufficient for a single simple kit with small joints. It is less flexible, however, and may be frustrating if the tip is too cool for larger connections or too hot for delicate work. If the kit uses lead-free solder or includes substantial ground connections, adjustable temperature and better heat recovery become more valuable.
Battery-powered irons are a specialized option
Cordless irons can be convenient for field repairs or locations without easy access to an outlet. For a bench-based through-hole kit, a corded station is usually simpler because it provides continuous power and avoids battery charging or runtime concerns.
A practical setup for through-hole kits
A useful starter setup includes:
- A temperature-controlled soldering station.
- A small or medium chisel tip plus a finer tip for crowded areas.
- Electronics solder appropriate for the kit.
- A stable iron stand and tip-cleaning material.
- Side cutters for trimming component leads.
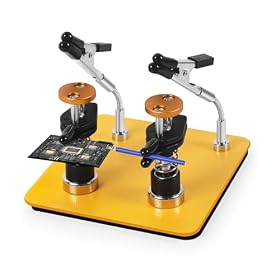
- A third-hand tool or PCB holder if the board moves while you work.
- Eye protection and suitable ventilation or fume extraction.
A fume extractor is preferable to simply blowing fumes across the work area. Wash your hands after handling solder, especially when working with leaded solder, and follow the kit and solder manufacturer's safety instructions.
Basic technique that reduces mistakes
Start with a clean, tinned tip and allow the iron to reach its working temperature. Heat the component lead and the copper pad together, then feed solder into the heated joint rather than melting a large blob onto the tip. Remove the solder, then remove the iron, allowing the joint to cool without movement.
A good joint should wet the lead and pad smoothly without forming a large ball, bridge, or dull irregular mound. If solder does not flow, check the tip condition, temperature, cleanliness, and whether both surfaces are being heated. Do not solve every problem by increasing the temperature.
Install and solder components in the order recommended by the kit instructions. Check polarity-sensitive parts such as diodes, LEDs, electrolytic capacitors, and integrated circuits before soldering. Trim leads only after confirming that the component is correctly positioned.
When to choose a more capable station
Consider a more capable station if you will regularly solder:
- Large ground-plane connections
- Thick wires or connector terminals
- Lead-free assemblies
- Repeated boards or repair work
- Fine-pitch work alongside through-hole parts
Useful features may include fast heat recovery, readily available replacement tips, automatic standby or sleep settings, and good temperature stability. Features such as a display or preset buttons are convenient, but they do not replace a suitable tip and sound soldering technique.
Bottom line
For through-hole kits, buy a temperature-controlled soldering station with interchangeable small and medium chisel tips. Choose a basic adjustable station for occasional hobby work and a more capable, faster-recovering station if you will solder larger joints, use lead-free solder, or build kits regularly. A fixed-temperature iron can work for simple projects, but it offers less control and leaves you with fewer options as your projects become more demanding.