Solder should flow onto heated metal surfaces, not be painted across them. Clean and tin the iron tip, heat the component and pad together, then feed solder into the joint.
Cold joint after using the iron like a paintbrush
If a solder joint looks rough, sits on top of the pad, or fails to make a reliable connection after you spread solder around with the iron, rework it rather than adding more solder. Soldering is about heating the parts being joined so solder wets them; the iron is not a brush for moving molten solder into place.
A dull finish alone does not prove a joint is bad—some lead-free solder naturally looks less shiny. Look for a joint that has not wetted both surfaces, is lumpy or cracked, or moves when it should be secure. When in doubt, inspect it under good light and rework it carefully.
Why the paintbrush motion causes trouble
Dragging a blob of solder over a pad can leave solder sitting on the surface without properly bonding to the pad and component lead. It can also pull heat away from the connection, spread solder where it is not wanted, and disturb the joint as it cools.
A sound joint forms when the pad and lead are heated together and solder flows onto both. The iron transfers heat; solder is fed into the heated connection.
Rework the joint step by step
Turn off and unplug the iron before changing its tip. Let it cool as directed by the manufacturer. Use eye protection, keep the work area ventilated, and avoid touching the hot tip or molten solder.
Check the tip. If it is dirty or oxidized, clean it using the tip-cleaning method recommended for your iron, then apply a small amount of fresh solder to leave it tinned. Replace a damaged tip with a compatible one; do not file or scrape a plated tip unless its manufacturer specifically permits it.
Check your solder and flux. Use solder intended for electronics and suitable flux. If the surfaces are oxidized or solder will not flow, add a small amount of compatible flux rather than repeatedly pushing solder around with the iron.
Position the parts securely. The lead should contact the pad. If the board or component shifts, secure it before heating; movement during cooling can spoil the joint.
Heat both surfaces at once. Place the tip so it contacts the pad and the component lead. After they begin to heat, touch solder to the connection—not just to the iron tip. It should flow onto the heated metal. Use only enough to form a neat connection without bridging nearby pads.
Remove the solder, then the iron. Let the joint cool without moving the board or component. Avoid holding the iron on a pad longer than needed; excess heat can lift pads or damage components.
Inspect the result. Check that solder has bonded to both the pad and lead, with no unintended bridge to a neighboring connection. If it still will not wet, stop and check the tip, surfaces, flux, and temperature guidance before trying again.
For a joint with too much solder, use solder wick or a solder removal tool suitable for electronics, following its instructions. Do not keep reheating a delicate pad while trying to perfect its appearance.
Product prices and availability are accurate as of the date/time indicated and are subject to change. Any price and availability information displayed on Amazon.com at the time of purchase will apply to the purchase of this product.
Check these causes if the joint still looks wrong
The tip is dirty, oxidized, or poorly tinned
A tip that will not transfer heat well makes it harder to heat the pad and lead together. Clean and tin it using the iron maker’s instructions. If the tip’s working surface is damaged or solder will not wet it after cleaning, replacement is usually more sensible than continued scraping.
The solder or flux is unsuitable
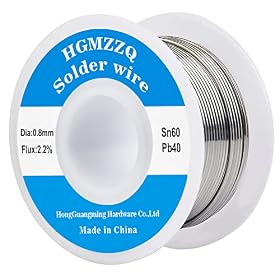
Use electronics solder and flux appropriate to the work. Plumbing solder and plumbing flux are not substitutes for electronics materials. Check the solder maker’s instructions, including whether the wire contains flux and whether additional flux is appropriate.
The parts are not being heated together
Touching solder to the iron and carrying a blob to the pad can leave solder on the pad without establishing a proper bond. Make contact with both the pad and lead, then feed solder to that heated connection.
The setup is not providing enough heat—or is providing too much
Use a tip suited to the size of the connection and set the station according to its instructions and the solder maker’s guidance. A tip that is too small for the joint may transfer heat poorly. Do not compensate by holding it on the board for a long time or choosing an arbitrary high setting; that can damage components and pads.
The joint or component moves while cooling
Hold the parts steady until the solder has solidified. If the pad is lifted, the lead is damaged, or the connection cannot be secured, stop applying heat and assess whether the board needs repair. For valuable or safety-critical equipment, have the repair handled by a qualified technician.
Product prices and availability are accurate as of the date/time indicated and are subject to change. Any price and availability information displayed on Amazon.com at the time of purchase will apply to the purchase of this product.
When to replace a part or stop
Replace a tip that is worn or damaged, and use a compatible replacement specified for your iron. If repeated joints fail despite a clean, tinned tip and correct technique, check the station and tip compatibility and follow the manufacturer’s troubleshooting instructions. Unusual electrical behavior, a damaged cord, or a station that does not control heat reliably is a reason to stop using it and seek qualified service—not to open a mains-powered unit yourself.
Product prices and availability are accurate as of the date/time indicated and are subject to change. Any price and availability information displayed on Amazon.com at the time of purchase will apply to the purchase of this product.
FAQ
Can I fix a cold solder joint by adding more solder?
Not reliably. Reheat the pad and lead together, use suitable flux if needed, and feed a small amount of solder into the heated connection. Remove excess solder rather than building up a blob.
Does a cold solder joint always look dull?
No. Appearance depends partly on the solder, and lead-free joints can look less shiny. Check whether solder has bonded to both the pad and lead and whether the joint is cracked, lumpy, or loose.
Should I touch the solder to the iron or the joint?
Feed solder to the joint after the iron has heated both the pad and component lead. Avoid carrying a blob from the iron tip and brushing it over the connection.