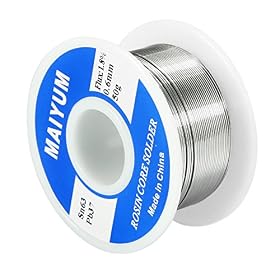
A dull finish can signal a cold solder joint, but it is not proof by itself—lead-free solder often cools matte. Look for poor wetting, a lumpy shape, cracks, or a weak connection, then rework the joint with a clean, properly heated tip.
A dull solder joint may be cold, but dullness alone does not prove it. Many lead-free joints naturally cool to a matte finish. A joint is more concerning if it is also lumpy, grainy, cracked, poorly bonded to the pad or lead, or electrically unreliable. To fix it, clean and tin the iron tip, apply suitable flux, heat the pad and component lead together, and let fresh solder flow into the joint.
Why solder joints look dull
Solder can look matte because of its alloy, especially when it is lead-free. Some alloys and cooling conditions produce a less shiny surface even when the joint is sound. Judge the joint by its shape and bond as well as its appearance.
Signs of a possible cold or poorly formed joint include:
Solder that sits in a ball instead of wetting the pad and lead
An irregular, grainy, or visibly cracked surface
A weak-looking bond or a component lead that moves in the solder
Intermittent operation or an open connection
A smooth, well-formed matte joint may be fine. If the connection matters, inspect it under good light and verify electrical continuity with the circuit powered off, using an appropriate meter and safe procedures.
How to fix a dull solder joint
Turn off and unplug the circuit. Let it cool, and follow the equipment maker’s safety instructions. Never rework a powered circuit.
Check the iron tip. Remove residue with the recommended cleaning method, then apply a small amount of solder to leave the working surface tinned. A dirty or oxidized tip transfers heat poorly.
Apply flux to the joint. Use flux suitable for electronics work. Flux helps solder wet clean metal; it does not replace removing heavy oxidation or contamination.
Heat both parts of the joint. Touch the tip to the component lead and pad at the same time. Once they are hot enough, feed a small amount of solder into the joint—not just onto the iron tip. Solder should flow over the connection rather than remain as a ball.
Remove the solder and iron, then keep the joint still. Movement while the solder solidifies can create a poor connection. Let it cool naturally before inspecting it.
Check the result. Look for solder that wets both surfaces without bridging neighboring pads. If the joint still looks poor, repeat the process with a clean tip and fresh flux rather than heating it for a long time.
Use a temperature appropriate for the solder, tip, and workpiece, following the soldering station and component manufacturers’ guidance. A large ground plane or connector may need more heat transfer than a small signal pad, but raising the temperature too far or dwelling too long can damage components or lift PCB pads. Stop if a pad begins to loosen or the board is discoloring.
Product prices and availability are accurate as of the date/time indicated and are subject to change. Any price and availability information displayed on Amazon.com at the time of purchase will apply to the purchase of this product.
Check the soldering setup
If several joints are dull or solder will not wet the work, check the process before replacing components:
Solder and flux: Confirm the solder is intended for electronics and that the flux is suitable and usable. Contamination or insufficient flux can prevent good wetting.
Tip condition and size: A damaged, dirty, or poorly tinned tip transfers heat badly. Choose a tip shape that can contact the joint adequately; a very fine tip may struggle with larger connections.
Temperature and heat transfer: Follow the solder and tool guidance. If the tip cools sharply on contact, the setting, tip condition, or station capacity may be unsuitable for the joint.
Workpiece cleanliness: Remove dirt or residue using an appropriate electronics-safe method. Do not scrape delicate pads aggressively.
Technique: Heat the pad and lead together, feed solder to the heated joint, and hold the parts still while it cools.
Use ventilation or local fume extraction, and avoid breathing soldering fumes. If the tip will not stay tinned after proper cleaning, it may be worn or damaged and need replacement. If the station cannot maintain heat or behaves erratically, stop using it and consult its manual or a qualified repair professional. A PCB pad that has lifted or a damaged trace may require a repair beyond simple reheating.
Product prices and availability are accurate as of the date/time indicated and are subject to change. Any price and availability information displayed on Amazon.com at the time of purchase will apply to the purchase of this product.
Product prices and availability are accurate as of the date/time indicated and are subject to change. Any price and availability information displayed on Amazon.com at the time of purchase will apply to the purchase of this product.
FAQ
Does a dull solder joint always mean it is cold?
No. Lead-free solder often cools with a matte finish. Look for other signs, such as poor wetting, a lumpy shape, cracks, movement, or an unreliable connection.
Should I add more solder to a dull joint?
Not automatically. First clean and tin the tip, apply suitable electronics flux, and heat the pad and lead together. Add only enough solder for it to flow across the connection.
Can I reheat a solder joint while the device is on?
No. Turn off and unplug the device before rework, and follow the manufacturer’s safety instructions. Some equipment may also retain hazardous energy after unplugging.
Why does solder bead up instead of sticking to the pad?
Common causes include insufficient heat transfer, a dirty or oxidized surface, a contaminated tip, or unsuitable or degraded flux. Clean the work appropriately, use electronics flux, and heat the pad and lead together.