Station temperature jumping around: causes and fixes
A soldering station may show small temperature changes during normal heating, but rapid, large, or persistent jumps can indicate a loose tip, poor contact, damaged handpiece cable, incorrect setup, or a failing sensor or heater.
A soldering station temperature that jumps around is often caused by the tip, not the control unit. Start by fitting a compatible tip correctly, cleaning and tinning it, and checking the handpiece connection. Small changes while the iron is heating or transferring heat into a joint are normal; rapid swings while the iron is sitting idle are more likely to indicate a contact, sensor, or electrical problem.
First, decide whether the temperature change is normal
A station does not maintain the exact displayed temperature every second. It switches the heater on and off to regulate heat, so the display may move slightly around the set temperature. The reading can also fall when the tip touches a large copper area, ground plane, connector, or other heat sink.
The behavior is more concerning when:
The display jumps rapidly by a large amount while the iron is idle.
The heater indicator constantly changes without the tip touching anything.
The iron alternates between too hot and too cool during simple joints.
The display shows an error, sensor warning, or unusual temperature value.
The tip temperature appears inconsistent even after the station has warmed up.
Do not judge the problem only by the display. A loose or oxidized tip can transfer heat poorly even when the station is reporting a normal internal temperature.
Troubleshoot the tip first
The tip is the most common and easiest-to-correct cause of unstable soldering performance.
Turn the station off and let the handpiece cool enough to handle safely.
Remove the tip according to the manufacturer's instructions.
Check for heavy oxidation, pitting, cracks, or a tip that no longer fits tightly.
Clean the tip with the recommended brass wool or damp sponge.
Fit the tip fully and squarely. Do not force a tip that is the wrong size or system.
Heat the iron and apply a small amount of solder to wet the working surface.
A tip that is only partly inserted may not make reliable thermal or sensor contact. An oxidized tip can also appear to have an unstable temperature because it cannot transfer heat consistently into the solder joint.
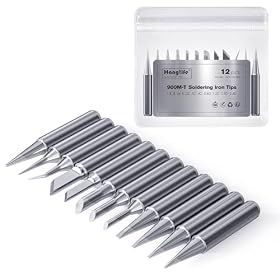
Use tips designed for the specific handpiece or cartridge system. Similar-looking tips are not necessarily interchangeable, and the wrong type can produce poor temperature control or damage the handpiece.
Product prices and availability are accurate as of the date/time indicated and are subject to change. Any price and availability information displayed on Amazon.com at the time of purchase will apply to the purchase of this product.
Check the handpiece, cable, and connector
With the station switched off and unplugged if the manufacturer's instructions require it, inspect the cable from the control unit to the iron. Look for cuts, crushed sections, heat damage, or a cable that has been sharply bent near either connector.
Check that:
The handpiece connector is fully seated.
Any locking collar or retaining ring is secure.
The cable is not pulling on the connector.
Moving the cable gently does not make the display jump or the heater indicator change.
Do not continue using a handpiece with exposed conductors, melted insulation, intermittent power, or a damaged plug. Handpiece cables may carry heater power and sensor connections, so internal repairs should follow the manufacturer's service instructions or be handled by a qualified technician.
Product prices and availability are accurate as of the date/time indicated and are subject to change. Any price and availability information displayed on Amazon.com at the time of purchase will apply to the purchase of this product.
Confirm the setup and operating conditions
Incorrect setup can look like a temperature-control fault. Verify the following:
The station is set to the temperature unit you expect, such as Celsius or Fahrenheit.
The selected temperature is appropriate for the solder and workpiece.
The tip size matches the joint. Very small tips lose heat quickly on large pads.
The iron is resting in its stand without the tip touching metal or a wet sponge continuously.
The station is connected to the correct power source and is not sharing an overloaded outlet or questionable power strip.
Any sleep, standby, boost, or automatic temperature-reduction feature is understood and configured correctly.
Lead-free solder and large copper areas commonly require more heat transfer than small, well-tinned joints. Increasing the set temperature excessively is not always the answer; it can accelerate tip oxidation and damage pads or components. Use the solder and temperature range recommended by the solder and station manufacturers.
Product prices and availability are accurate as of the date/time indicated and are subject to change. Any price and availability information displayed on Amazon.com at the time of purchase will apply to the purchase of this product.
Check whether the reading is actually wrong
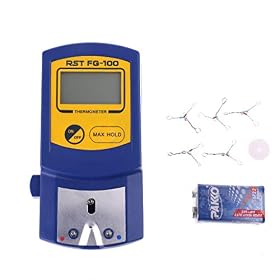
If the station has stabilized but the display still seems incorrect, compare it with a suitable soldering-tip thermometer or temperature measurement tool. Use the measurement method recommended by the station manufacturer because readings vary with tip shape, measurement location, contact pressure, and the condition of the tip.
A basic comparison can help separate two problems:
If the external measurement is reasonably stable but the display jumps, the station's display, sensor input, or calibration may be at fault.
If both readings change significantly, investigate the tip, handpiece, heater, or sensor.
Do not assume that an inexpensive external thermometer is laboratory-accurate. It is most useful for identifying a large inconsistency, not for proving a precise temperature value.
If the station provides a calibration function, use it only with the correct measuring equipment and according to the manual. Calibration cannot fix a loose tip, damaged cable, failing heater, or defective sensor.
Consider the heater or temperature sensor
Most soldering handpieces regulate temperature using a sensor near the heating element. Depending on the design, the sensor may be built into the heater assembly or tip cartridge. A failing sensor can cause erratic readings, unexpected heater cycling, error messages, or an iron that becomes far hotter or cooler than the setpoint.
Possible signs of a heater or sensor problem include:
Temperature changes while the iron is untouched and correctly assembled.
The station takes much longer than usual to heat.
The iron never reaches the set temperature.
The tip overheats despite a normal display.
The station shuts down or reports a sensor or heater fault.
Do not open the station or bypass a sensor, fuse, or safety circuit. Unplug the unit and consult the manual or an authorized repair service. Mains-powered stations contain hazardous voltages even when the front controls appear inactive.
When to replace a part or the station
A replacement tip is the sensible first purchase when the current tip is oxidized, damaged, loose, or simply worn out. If the problem follows the handpiece, a compatible replacement heater, cartridge, or complete handpiece may be appropriate—but only if that part is listed for the exact station and connector system.
Replacement of the complete station becomes more reasonable when:
Calibration does not resolve a verified temperature error.
The station shows recurring heater or sensor faults.
Repair parts are unavailable or the repair cost approaches a replacement unit.
Until the cause is resolved, avoid using the station on heat-sensitive or safety-critical assemblies. If the tip becomes unexpectedly hot, the cable is damaged, or the station produces smoke, odor, sparks, or repeated electrical faults, disconnect it safely and stop using it.
FAQ
Is it normal for a soldering station temperature to fluctuate?
Small fluctuations during warm-up and normal heater cycling are expected. A reading that changes when the tip contacts a large joint is also normal. Rapid, large changes while the iron is idle are not typical and should be investigated.
Why does my soldering station temperature drop when I touch a joint?
The joint may be drawing heat away faster than the tip can replace it. Large copper areas, ground planes, thick wires, and lead-free solder can make the drop more noticeable. A larger, properly tinned tip may transfer heat more effectively than raising the temperature excessively.
Can a bad soldering tip cause temperature fluctuations?
Yes. An oxidized, damaged, loose, or incompatible tip can transfer heat poorly and may not make reliable contact with the heater or sensor assembly. Cleaning, tinning, or replacing the tip is a useful first step.
How can I tell whether the station sensor is failing?
If the temperature jumps while the iron is untouched, multiple compatible tips show the same behavior, or the station reports sensor or heater errors, the sensor or heater may be failing. Stop using the station if it overheats or behaves unpredictably, and follow the manufacturer's repair guidance.