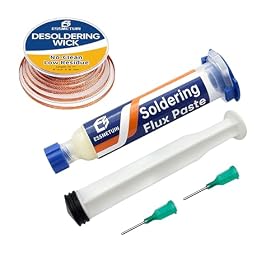
A practical guide to choosing a lead-free solder and flux pen kit for circuit boards, wire repairs, and general electronics work.
Lead-free solder and flux pen kit
A lead-free solder and flux pen kit combines the two consumables needed for many electronics repairs: solder wire to form the joint and liquid flux to help the solder wet clean metal surfaces. The right kit should match your work, soldering iron temperature range, cleanup preferences, and the type of components or circuit boards you repair.
What to check before buying
Solder alloy and melting behavior
Lead-free solder requires more heat than traditional tin-lead solder, although the exact working temperature depends on the alloy, joint size, board design, and soldering iron. Check that your iron or station can reach the manufacturer’s recommended operating range without overheating small pads or components.
Common lead-free solder is based primarily on tin and may include other metals to adjust melting behavior and joint performance. The product label should clearly identify the alloy rather than simply saying “lead-free.” If you need to match existing solder on a repair, use the same or a compatible alloy when practical.
Solder diameter
Solder diameter affects how easily you can control the amount applied:
Thin solder is useful for small pads, surface-mount components, and precise rework.
Medium-diameter solder is a flexible choice for through-hole components and general circuit-board repairs.
Thicker solder can be useful for larger wires and terminals, but it is easier to apply too much to small joints.
A kit with one diameter is usually adequate for a focused task. If you work on both fine-pitch boards and larger connections, buying separate diameters may be more useful than choosing a larger all-purpose roll.
Flux core versus a separate flux pen
Many solder wires have a flux core, so they already release flux as they melt. A flux pen adds a controlled coating of liquid flux to oxidized pads, old solder, or difficult-to-wet surfaces.
A flux pen is especially useful when:
solder beads up instead of spreading across the pad;
you are removing or replacing an old component;
a board has tarnished or oxidized copper;
you need to pre-tin a wire or connector;
you want to limit flux application to a small area.
Additional flux is not a substitute for cleaning, correct tip temperature, or adequate heating of the joint. Applying too much can leave more residue and make cleanup harder.
Choose the right flux type
The flux label matters as much as the solder label. The most practical options for electronics work are usually no-clean, rosin-based, or water-soluble flux, but they are not interchangeable in cleanup requirements.
No-clean flux
No-clean flux is designed to leave a relatively small amount of residue that may not require removal in ordinary electronics work. “No-clean” does not mean residue is always invisible or harmless on every assembly. If the board must be especially clean, inspect it and follow the flux manufacturer’s cleaning guidance.
Rosin or rosin-based flux
Rosin flux is common in electronics soldering and may leave visible, sticky residue. It can often be removed with an appropriate electronics-safe cleaner. Verify the product’s intended use before applying it to plastics, labels, connectors, or sensitive assemblies.
Water-soluble flux
Water-soluble flux generally requires thorough cleaning after soldering. Leaving it on a board can cause problems over time, so it is a poor choice if you cannot reliably wash, rinse, and dry the assembly according to the manufacturer’s instructions.
Avoid acid or plumbing flux for circuit boards. Flux intended for copper pipe or other non-electronic work can be corrosive and may damage components or board materials.
Product prices and availability are accurate as of the date/time indicated and are subject to change. Any price and availability information displayed on Amazon.com at the time of purchase will apply to the purchase of this product.
Is a kit better than buying solder and flux separately?
A kit is convenient when you want compatible consumables in one purchase. It can also be a good starting point for occasional repairs or a new soldering station. Before buying, confirm that the solder and pen are both intended for electronics and that the kit identifies the solder alloy and flux type.
Buying separately may be better when you already know your preferences. For example, you may want a very fine solder diameter for surface-mount work, a specific alloy for repeatable production repairs, or a flux type that matches your cleaning process.
Do not assume that a larger solder spool or a larger flux pen is automatically better. Flux can dry out, and solder that sits unused for a long time may become inconvenient to handle or collect contamination if it is stored poorly.
Product prices and availability are accurate as of the date/time indicated and are subject to change. Any price and availability information displayed on Amazon.com at the time of purchase will apply to the purchase of this product.
How to use the solder and flux pen
Secure and inspect the board. Disconnect power and remove batteries before soldering. Check for lifted pads, burned insulation, or damaged traces.
Clean the area. Remove dirt, old residue, and loose oxidation with a suitable electronics-cleaning method.
Tin the iron tip. A thin coating of solder helps transfer heat and protects the working surface of the tip.
Apply a small amount of flux. Use the pen sparingly on the pad, wire, or component lead.
Heat the joint, not just the solder. Touch the solder to the heated joint when the surfaces are hot enough to wet properly.
Remove solder, then the iron. Allow the joint to cool without movement. A good joint should be properly wetted rather than sitting as a loose ball.
Inspect and clean if needed. Remove residue according to the flux instructions, especially when using water-soluble or visibly corrosive formulations.
Keep the pen capped between uses. If the tip dries out or becomes blocked, do not force it into the board; replace the tip or pen if it cannot apply flux cleanly.
Product prices and availability are accurate as of the date/time indicated and are subject to change. Any price and availability information displayed on Amazon.com at the time of purchase will apply to the purchase of this product.
Specifications that affect your choice
Prioritize these details on the package or product listing:
Lead-free designation: Confirm that the solder is intended for electronics and does not contain lead.
Alloy identification: Look for the stated alloy composition and any recommended working information.
Solder diameter: Match it to the size of your pads, wires, and components.
Flux core information: Check whether the wire is flux-cored and identify the flux type if listed.
Flux pen chemistry: Confirm whether it is no-clean, rosin-based, water-soluble, or another electronics-specific formulation.
Cleaning instructions: Make sure you have the appropriate cleaner or washing process if the flux requires it.
Storage guidance: Solder should be kept clean and dry, while flux pens should remain sealed to reduce drying and contamination.
For fine-pitch surface-mount work, controllable solder diameter and a precise flux applicator matter more than simply maximizing the amount of material in the kit. For wires, connectors, and through-hole repairs, a general-purpose diameter may be easier to handle.
Safety and compatibility
Soldering produces heated metal, flux fumes, and potentially irritating residue. Work in a ventilated area, use fume extraction where practical, wash your hands after handling solder and flux, and follow the product’s safety data and manufacturer instructions. Do not solder energized circuits unless the equipment is specifically designed for that procedure and you understand the risks.
Check compatibility before applying flux to conformal coatings, flex circuits, plastics, painted surfaces, switches, or enclosed connectors. When repairing valuable or safety-critical equipment, practice on scrap material or consult a qualified technician.
Bottom line
Choose a lead-free solder and flux pen kit with a clearly identified electronics solder alloy, a diameter suited to your work, and a flux type you can clean correctly. A no-clean pen is convenient for many general repairs, while water-soluble or rosin-based products may be appropriate when their required cleanup process fits your workflow. If the kit does not identify the alloy, flux chemistry, or intended electronics use, choose a better-labeled product instead.
FAQ
Do I need a flux pen if my lead-free solder has a flux core?
Not always, but a flux pen can help with oxidized pads, old solder, difficult-to-wet surfaces, wire tinning, and component removal. Apply only a small amount and follow the flux manufacturer’s cleanup guidance.
What flux is best for electronics soldering?
No-clean, rosin-based, and water-soluble fluxes can all be used for electronics when the product is specifically intended for that purpose. The best choice depends on whether you can complete the required cleanup; avoid acid or plumbing flux on circuit boards.
What solder diameter should I buy?
Use thinner solder for small surface-mount pads and fine work, a medium diameter for general through-hole repairs, and thicker solder for larger wires or terminals. The ideal size depends on the joint and how precisely you need to control the amount applied.
Can I use a lead-free solder kit with any soldering iron?
The iron must be capable of reaching the manufacturer’s recommended temperature and transferring enough heat to the joint. Follow the iron, station, solder, and component manufacturer instructions, and avoid excessive heat that can damage pads or parts.