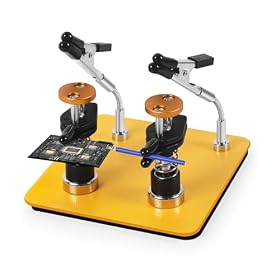
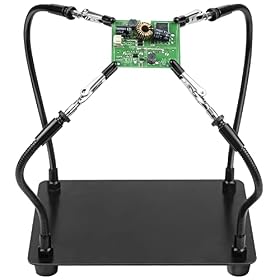
A helping-hands stand with a magnifier can hold small parts steady while you solder, but stability and adjustability matter more than a long feature list. Here’s what to look for before buying.
A helping-hands stand with a magnifier makes small soldering jobs easier by holding wires, circuit boards, and components while you work. The best choice depends on more than magnification: a stable base, useful clip adjustment, a clear lens, and enough room for your soldering iron and hands are usually more important.
What a helping-hands stand with a magnifier does
A typical unit combines:
Two or more adjustable clips for holding a workpiece
A magnifying lens for inspecting small joints and components
A base or frame that keeps the assembly on the bench
Joints, pivots, or flexible arms for positioning the clips and lens
Sometimes an integrated light for illuminating the work area
It is useful for through-hole soldering, connector repair, wire splicing, model work, jewelry, and inspection of small electronic parts. It is not a substitute for a proper fixture when the workpiece is large, heavy, hot, or under significant mechanical stress.
Features that matter when choosing one
Stable base
Stability should be the first priority. A stand that shifts when you touch a wire or reposition a clip can make soldering more difficult and increase the chance of touching the iron to the wrong area.
Look for a base with enough weight and footprint for the size of work you expect to hold. A metal base may resist movement better than a lightweight plastic base, but the overall design matters more than the material alone. Rubber or non-slip feet can help protect the bench and reduce sliding.
For larger circuit boards or frequent use, choose a stand that appears proportioned for the workpiece rather than a very small unit designed only for light inspection.
Clip adjustment and reach
Alligator clips are useful, but they need to move into practical positions without blocking the soldering area. Check how many joints each arm has and whether the arms can rotate independently.
Important questions include:
Can the clips hold both a circuit board and a loose wire?
Can you approach the joint with the iron from the side?
Do the arms stay in position after adjustment?
Are the clip jaws insulated or protected where they contact delicate parts?
Can the clips be replaced if they become loose or damaged?
A greater adjustment range is not automatically better if the joints are difficult to tighten or the assembly becomes unstable when extended.
Magnifier quality and size
Magnification helps with inspection, but higher magnification generally produces a smaller viewing area and requires more precise positioning. A moderate-power lens with a useful field of view may be easier for general soldering than a very strong lens intended for tiny details.
Pay attention to:
Lens diameter or viewing area
Stated magnification
Lens clarity and distortion near the edges
Whether the lens can be moved independently of the clips
The working distance between the lens and the circuit board
The working distance is especially important. If the lens must sit very close to the board, there may not be enough room for the soldering iron, solder wire, and your fingers. A lens that can be moved out of the way is helpful when switching between soldering and inspection.
Lighting
An integrated LED light can make component markings and solder joints easier to see, particularly when the stand casts shadows. Lighting is useful, but it should not be the only light in the workspace.
Check whether the light:
Illuminates the area under the lens rather than only the surrounding bench
Has an adjustable angle
Uses a replaceable or standard power source, if applicable
Creates glare on the lens or shiny solder joints
Keep the light and its wiring away from the hot end of the soldering iron. Follow the manufacturer’s instructions for batteries, adapters, and cleaning.
Joint strength and locking
Flexible arms are convenient for quick repositioning, while locking joints can provide better support for heavier or more awkward workpieces. The important issue is whether the arm remains steady after you let go.
Avoid over-tightening knobs or joints. Excessive force can damage threads, crack plastic parts, or make future adjustment difficult. If a joint cannot hold its position with normal tightening, the stand may be undersized for the load.
Materials and heat resistance
The clips may contact warm components or absorb heat from a wire during soldering. However, most helping-hands stands are not designed to hold parts directly against a hot soldering iron or to support parts at high temperatures for extended periods.
Use heat-resistant handling practices, keep flammable materials away from the iron, and return the soldering iron to its stand when it is not in use. Let a workpiece cool before repositioning it if the clips or stand become hot.
Product prices and availability are accurate as of the date/time indicated and are subject to change. Any price and availability information displayed on Amazon.com at the time of purchase will apply to the purchase of this product.
Choosing the right type for your work
Basic helping-hands stand
A basic stand is suitable for occasional soldering, wire holding, and simple inspection. It is usually the most compact option, but it may have limited reach and a smaller base.
Choose this type if you work on small, lightweight parts and need a simple third hand rather than a dedicated inspection setup.
Stand with integrated magnifier
This design is convenient when you frequently inspect solder joints or small component markings. Make sure the lens can be positioned without blocking access to the workpiece.
A fixed lens may be adequate for straightforward jobs, while an independently adjustable lens is more flexible for boards of different sizes.
Stand with magnifier and light
A lighted model is useful in a dim workspace or when the lens and clips create shadows. Compare the light’s position and power requirements with the way your bench is arranged.
If you already have good task lighting, prioritize stability and arm adjustment instead of paying for lighting you may rarely use.
Larger multi-arm stand
A larger stand can hold a circuit board, wire, and another small component at the same time. It may be preferable for repeated repair work, but it also takes more bench space and can be harder to reposition.
Confirm that the base and arms are suited to the size and weight of your typical workpiece. More arms do not help if they crowd the area around the soldering joint.
Product prices and availability are accurate as of the date/time indicated and are subject to change. Any price and availability information displayed on Amazon.com at the time of purchase will apply to the purchase of this product.
How to use one safely and effectively
Place the stand on a level, uncluttered surface.
Position the workpiece before heating the soldering iron.
Tighten the clips only enough to hold the part securely.
Keep the clips and lens clear of the iron’s hot tip.
Leave a direct path for the soldering iron to reach the joint and return to its holder.
Inspect the joint through the lens after the workpiece has cooled enough to handle safely.
Disconnect or turn off integrated lighting when required by the manufacturer before cleaning or adjustment.
Use ventilation or a suitable fume extractor for soldering fumes, and follow safe practices for the solder and flux you use. If the stand repeatedly tips, slips, or allows the workpiece to rotate unexpectedly, stop using it until the setup is corrected.
Product prices and availability are accurate as of the date/time indicated and are subject to change. Any price and availability information displayed on Amazon.com at the time of purchase will apply to the purchase of this product.
Common limitations
A helping-hands stand is not ideal for every task. Common problems include:
Clips slipping on smooth or heavy parts
The magnifier being too close to the workpiece
Arms sagging when fully extended
A narrow base tipping when the workpiece is off-center
The lens causing glare or reducing the usable working area
Clips blocking access to the solder joint
You can often improve positioning by shortening the arm extension, moving the workpiece closer to the center of the base, or using a different clip angle. Do not compensate for poor stability by adding improvised weights near hot electrical equipment unless the manufacturer permits that setup.
When to replace it
Replace the stand when the clips no longer grip, joints cannot hold position, the base is cracked or unstable, or the lens is badly scratched or distorted. If the rest of the stand is sound, replacement clips or a replacement lens may be reasonable if compatible parts are available.
A replacement unit makes more sense when several parts are worn, the base is too small for your work, or the stand consistently obstructs access to the soldering area. For frequent electronics repair, a stable fixture designed around your usual board size may be more useful than a larger collection of loosely adjustable arms.
FAQ
What magnification is best for a helping-hands stand?
A moderate magnification is usually the most practical starting point for soldering because it provides a useful viewing area and working distance. Higher magnification can help with very small details but may make positioning and hand movement more difficult.
Are helping-hands stands useful for soldering circuit boards?
Yes. They can hold a board, wire, or component steady while you solder and inspect the joint. Choose a base and clip arrangement that leave clear access for the iron and solder.
Do I need a lighted magnifier?
Not necessarily. Integrated lighting is helpful in a dim workspace or where the lens creates shadows, but good task lighting may be sufficient. Stability and clip adjustment should generally come first.
How do I stop a helping-hands stand from tipping?
Center the workpiece over the base, minimize arm extension, and tighten the adjustment joints normally. If it still tips with your typical workpiece, choose a stand with a larger or heavier base rather than relying on an improvised setup.