A chisel tip transfers heat more effectively than a fine conical tip when soldering thicker wires. Here is how to choose the right iron, tip size, wattage, and temperature control without overheating the joint or insulation.
A chisel-tip soldering iron is usually a better choice for thicker wires because its broad, flat face transfers heat more efficiently than a needle-like tip. For most wire work, look for a temperature-controlled iron or station with enough power to recover heat quickly, a tip width suited to the joint, and replacement tips that are easy to obtain.
Why use a chisel tip for thicker wires?
Thicker wire absorbs more heat than a small circuit-board pad or component lead. A narrow conical tip may reach the set temperature but still struggle to deliver enough heat to the joint. That can lead to slow solder melting, excessive contact time, and heat traveling farther into the wire insulation.
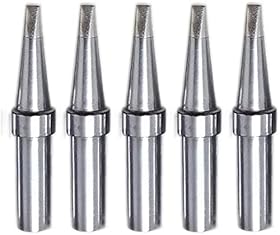
A chisel tip helps because its flat surface creates a larger contact area. It can touch the wire and the terminal at the same time, allowing heat to flow into both parts of the joint.
The tip should still be proportional to the connection. A very large tip can transfer too much heat to a small pad, connector, or nearby plastic part.
What to look for when buying an iron
Tip width and shape
For thicker wires, a small or medium chisel tip is often the most versatile starting point. Choose a tip that is broad enough to contact the wire and terminal together without covering nearby components.
As a general guide:
Small chisel tips: Better for moderate-gauge wire, small terminals, and compact circuit boards.
Medium chisel tips: Useful for heavier hookup wire, switches, connectors, and larger solder lugs.
Large chisel tips: Intended for substantial metal masses, heavy terminals, or heat-sinking connections; use them cautiously around circuit boards and insulation.
Tip dimensions vary between manufacturers, so check the actual tip compatibility and stated width rather than assuming that every similarly named tip fits the same iron.
Temperature control
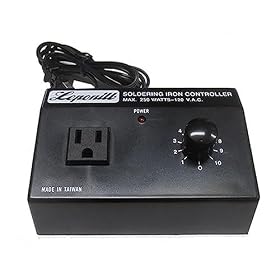
Adjustable temperature control is preferable to a fixed-temperature iron. It lets you use a lower setting for delicate insulation and raise the temperature when a large terminal or heat sink pulls heat away.
The correct setting depends on the solder alloy, joint size, tip condition, and the materials being joined. Follow the solder and iron manufacturer’s guidance. Avoid compensating for a poor connection by continually increasing temperature; a contaminated tip, inadequate flux, or insufficient power may be the real problem.
Wattage and heat recovery
Wattage is not the same as tip temperature. It describes how much electrical power the iron can use to maintain heat, especially when the joint draws heat away.
For thicker wires, prioritize:
Adequate rated power for the size of work you perform
Fast heat recovery after the tip contacts the joint
Stable temperature regulation
A tip family with larger chisel options
A lower-wattage iron may work for occasional medium-size wires if the connection is small and well-prepared. For repeated work on heavy wire, terminals, or connectors, a more powerful temperature-controlled station is generally easier to use because it spends less time heating the joint.
Do not choose based on wattage alone. The heater design, thermal coupling, control system, and available tips also affect performance.
Tip compatibility and availability
Before buying, confirm how tips attach to the handpiece and whether replacement chisel tips are available in several sizes. Some systems use proprietary cartridges or heater-integrated tips, while others use separate slide-on or screw-on tips.
A tip that is technically compatible may still be a poor choice if the available sizes do not match your work. Check the manufacturer’s compatibility chart rather than relying only on the visual shape of the tip.
Handle, stand, and cord design
A comfortable handle and flexible cord matter when you need to hold the wire, solder, and iron in a controlled position. A stable stand should keep the hot tip away from the work surface, cords, and flammable materials.
For bench work, a station with a separate control unit can keep the handpiece lighter. For occasional repairs, a compact iron may be more convenient, provided it has the power and tips required for the wire sizes you handle.
Product prices and availability are accurate as of the date/time indicated and are subject to change. Any price and availability information displayed on Amazon.com at the time of purchase will apply to the purchase of this product.
Matching the iron to the wire and connection
Wire gauge alone does not determine the required iron. A short piece of wire joined to a small terminal may need less heat than a thinner wire attached to a large metal lug that acts as a heat sink.
Consider these factors:
Wire size: Larger conductors generally require more heat.
Terminal mass: Large lugs, chassis parts, and connector shells draw heat away.
Joint access: You need enough room for the chisel face to contact both surfaces.
Insulation type: Some insulation softens or melts quickly and needs heat kept near the joint.
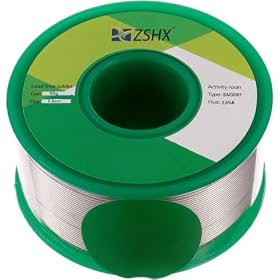
Solder alloy: Lead-free solder commonly requires more heat than traditional tin-lead solder, but always follow the alloy manufacturer’s guidance.
Heat sensitivity: Nearby plastic, batteries, semiconductors, and circuit-board pads may require a smaller tip and shorter heating time.
For very large cables, battery connections, or heavy mechanical terminals, a soldering iron may not be the correct tool. A high-current crimp connection or another manufacturer-approved joining method may be safer and more reliable. Never solder energized wiring, and disconnect power sources before working.
Product prices and availability are accurate as of the date/time indicated and are subject to change. Any price and availability information displayed on Amazon.com at the time of purchase will apply to the purchase of this product.
How to solder thicker wires with a chisel tip
Disconnect power. Remove batteries and isolate the circuit before soldering.
Strip only the needed length. Avoid nicking or cutting conductor strands.
Secure the work. Use a vise, clamp, or helping-hands tool so the wire cannot move while the solder solidifies.
Clean and tin the tip. A thin, shiny layer of solder improves heat transfer. Do not work with a dry, oxidized tip.
Pre-tin when appropriate. Apply a small amount of solder to the wire and, if suitable, the terminal.
Heat both parts. Place the chisel face against the wire and terminal, not just against the solder.
Feed solder into the heated joint. Solder should melt from the joint’s heat rather than being melted only on the tip.
Remove solder, then the iron. Let the joint cool without movement.
Inspect the connection. Look for complete wetting, a secure mechanical connection, and no loose strands or solder bridges.
Protect the joint. Use appropriately sized heat-shrink tubing or another suitable insulation method after the connection has cooled.
Use ventilation or a suitable fume extractor, especially with flux-containing solder. Do not deliberately breathe solder or flux fumes, and wash your hands after handling solder.
Product prices and availability are accurate as of the date/time indicated and are subject to change. Any price and availability information displayed on Amazon.com at the time of purchase will apply to the purchase of this product.
Common problems and fixes
The solder will not melt quickly
Check whether the tip is clean and tinned, whether it is making contact with both surfaces, and whether the joint is unusually large or connected to a heat sink. A larger compatible chisel tip or a higher-power temperature-controlled station may help.
If the iron loses heat quickly when it touches the connection, its heat recovery may be inadequate for the job.
The wire insulation is melting
The tip may be too large or the joint may be taking too long to heat. Verify the temperature, move the heat closer to the terminal, and prepare the surfaces before applying heat. If the insulation continues to soften, use a smaller tip, reduce contact time, or choose a joining method better suited to the wire.
Solder beads up instead of flowing
Oxidation, dirt, insufficient flux, or inadequate heating can prevent wetting. Clean the surfaces as appropriate, refresh the tip coating, and heat the wire and terminal together. Do not rely on a large blob of solder to compensate for poor contact.
The joint looks dull or cracks when moved
The joint may have moved while cooling, or the surfaces may not have been hot enough for proper wetting. Reheat it, add only enough fresh solder to form a sound connection, and keep the parts still until solid.
The tip turns black or stops transferring heat
Heavy oxidation, burned flux residue, or incorrect tip maintenance may be responsible. Clean and re-tin the tip according to the iron manufacturer’s instructions. Do not file or aggressively abrade a plated tip unless the manufacturer specifically permits it, because this can remove the working surface.
Product prices and availability are accurate as of the date/time indicated and are subject to change. Any price and availability information displayed on Amazon.com at the time of purchase will apply to the purchase of this product.
When a different tool is better
A chisel-tip iron is suitable for many stranded-wire, terminal, connector, and circuit-board repairs. It is not automatically suitable for every thick cable.
Consider crimping when the connection is intended to handle substantial current, vibration, or mechanical stress and the connector manufacturer specifies a crimp method. For large thermal masses, a dedicated high-power soldering tool may be required. For mains wiring or safety-critical equipment, follow applicable codes and manufacturer instructions and use a qualified professional when appropriate.
Bottom line
For thicker wires, choose a temperature-controlled soldering iron or station with good heat recovery and compatible chisel tips in more than one size. Start with a small or medium chisel tip that can contact both the wire and terminal, then match the temperature and solder alloy to the materials. If the joint still takes too long to heat, the limitation may be the iron’s power or the connection method—not the tip shape alone.
FAQ
What size chisel tip is best for thick wires?
Use the smallest chisel tip that can contact both the wire and terminal at the same time. A small or medium tip is a practical starting point; larger tips are for substantial terminals and heat-sinking connections.
Is a chisel tip better than a conical tip for wire?
Usually, yes, for thicker wires. The flat face of a chisel tip transfers heat across a larger contact area, while a conical tip is better suited to precision work and small joints.
How much wattage do I need to solder thick wire?
There is no universal wattage because joint size, terminal mass, solder alloy, and heat recovery all matter. Choose a temperature-controlled iron with enough power to maintain heat when the tip contacts the connection, rather than comparing wattage alone.
Can I solder very large battery or power cables with an iron?
Possibly, but soldering may not be the preferred connection method. For high-current or mechanically stressed wiring, use the joining method specified by the connector or equipment manufacturer, such as an appropriate crimp, and work only with power fully disconnected.