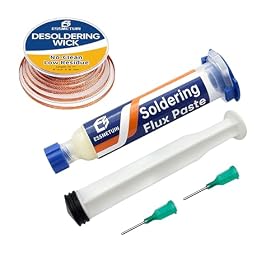
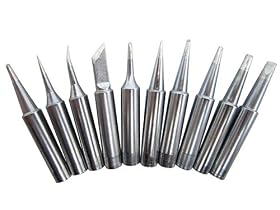
If desoldering braid is not absorbing solder, the usual causes are oxidized braid, insufficient flux, poor heat transfer, or the wrong braid width. Work through these checks before replacing your soldering iron.
Desoldering braid that will not wick solder is usually dealing with a consumable or heat-transfer problem—not a failed soldering iron. Start with a fresh section of clean braid, add suitable flux, and make sure the iron tip heats both the braid and the solder joint. Then check braid width, tip condition, temperature, and the joint itself.
Check the braid first
Desoldering braid, also called solder wick or soldering wick, absorbs molten solder through capillary action. It works poorly when the copper braid is oxidized, contaminated, or already saturated with solder.
Try these checks:
Cut off the used end and expose a fresh section.
Make sure the braid is dry and free from oil, dirt, and residue.
Check that the copper strands are not dark, heavily oxidized, or flattened.
Do not reuse a section that is already full of solder.
Avoid pulling the braid across the board while it is hot, which can lift pads or damage traces.
If a fresh section still will not take solder, move on to flux and heat transfer.
Add enough flux
Flux helps remove oxides and allows molten solder to spread into the braid. Many solder wicks are flux-coated, but the coating can be weak, dried out, or insufficient for oxidized joints.
Apply a small amount of electronics flux to the braid or the joint, then place the braid over the solder. Use rosin-based or no-clean flux intended for electronics. Avoid acid flux, plumbing flux, or other corrosive products on circuit boards.
Too much flux can leave residue and make cleanup harder, so use only enough to wet the joint and braid. Follow the flux manufacturer's handling and cleaning instructions.
Product prices and availability are accurate as of the date/time indicated and are subject to change. Any price and availability information displayed on Amazon.com at the time of purchase will apply to the purchase of this product.
Check the iron tip
A dirty or oxidized tip often transfers too little heat to melt the solder through the braid. The tip should have a clean, shiny layer of solder on its working surface—not be completely dry.
Try the following:
Heat the iron to the temperature recommended for your solder and board work.
Clean the tip with brass wool or a damp sponge approved for soldering tips.
Apply a small amount of fresh solder to tin the tip.
Use the broadest suitable part of the tip to contact the braid and joint.
A very small pointed tip may not transfer enough heat, even when the station display shows the correct temperature. A small chisel or bevel tip often makes better contact for removing solder from pads and through-hole joints, provided it fits the work area.
Replace a tip that is badly pitted, worn, or no longer accepts solder after proper cleaning and tinning. Do not file or sand a plated soldering tip unless the manufacturer specifically allows it.
Product prices and availability are accurate as of the date/time indicated and are subject to change. Any price and availability information displayed on Amazon.com at the time of purchase will apply to the purchase of this product.
Improve the heat-transfer setup
The braid must be heated along with the solder. Place the braid directly over the soldered area and press the tinned iron tip on top of the braid. Hold the assembly still until the solder visibly melts and begins traveling into the braid.
Common setup problems include:
The iron is touching the braid but not the solder joint.
The braid is folded over itself, preventing good contact.
The work is being held in a way that acts as a heat sink.
The iron temperature is too low for the solder type or joint size.
The iron is removed as soon as the surface solder softens, before the braid can absorb it.
Use the lowest temperature that reliably melts the solder and avoids unnecessary board damage. Lead-free solder generally requires more heat than traditional tin-lead solder, but the correct setting depends on the solder alloy, board, component, and station. Follow the solder and equipment manufacturers' recommendations rather than relying on a fixed temperature.
If the joint is large, add a small amount of fresh solder first. This can improve heat transfer and help old, oxidized solder melt. Then apply fresh braid and flux.
Product prices and availability are accurate as of the date/time indicated and are subject to change. Any price and availability information displayed on Amazon.com at the time of purchase will apply to the purchase of this product.
Choose the right braid width
Braid that is too narrow may not absorb enough solder or provide good contact with the joint. Braid that is too wide may cover nearby components, pads, or traces and can draw heat away from a small connection.
As a general guide:
Use narrow braid for small surface-mount pads and fine-pitch work.
Use medium braid for common component pads and general circuit-board repairs.
Use wider braid for large through-hole joints, ground connections, and broad copper areas.
The braid should cover the solder without extending so far that it contacts unrelated pads. If the braid is not filling with solder across its width, try a fresh piece or a slightly narrower size after confirming that the joint is actually molten.
Product prices and availability are accurate as of the date/time indicated and are subject to change. Any price and availability information displayed on Amazon.com at the time of purchase will apply to the purchase of this product.
Check the solder joint and board
Some joints are difficult because the board or connection draws heat away faster than the iron can supply it. Large ground planes, thick copper, shielding, connector tabs, and heavy through-hole leads are common examples.
For a stubborn joint:
Secure the board so it cannot move.
Use a larger suitable tip for better contact.
Add flux and a small amount of fresh solder.
Heat the joint long enough for all of the solder—not just the surface—to melt.
Lift the braid and iron together once the solder has flowed into the braid.
Let the board cool briefly before trying again.
Do not keep heating a small pad for an extended period. Excessive heat can lift pads, loosen vias, discolor laminate, or damage nearby components. If the solder will not melt with a clean, properly tinned tip at an appropriate setting, stop and reassess rather than continually increasing temperature.
If the braid sticks to the joint
Braid may stick when it becomes saturated, when the solder cools before removal, or when there is too little flux. Add flux, reheat the area, and lift the braid while the solder is molten. Do not yank it away cold.
If copper strands remain on the pad, remove loose material carefully and inspect the pad and trace for damage. A magnifier can help. Repair lifted or damaged pads only if you have the appropriate board-repair skills; otherwise, consult a qualified electronics repair professional.
When the problem is the soldering station
The station may be at fault if several fresh braid sections fail on otherwise ordinary joints and the tip cannot maintain heat. Possible signs include:
The tip stops melting solder when it contacts a large joint.
The displayed temperature changes sharply or does not recover.
The heater or temperature sensor produces an error.
Multiple known-good tips behave the same way.
The handle, cord, or connector is damaged.
Unplug equipment before inspecting cables or replacing parts, and follow the station manufacturer's service instructions. Do not open mains-powered equipment unless you are qualified to do so. Replacing the tip or using a compatible replacement handle may be reasonable when the issue is isolated to a worn consumable. If the station has unstable temperature control, damaged wiring, or an electrical fault, replacement or professional service is safer than continued use.
A quick fix sequence
For most cases, use this order:
Cut to a fresh section of braid.
Clean and tin the iron tip.
Add electronics-safe flux.
Place the braid directly over the joint.
Press a broad, tinned tip on top of the braid.
Wait for the solder to fully melt and wick into the braid.
Replace the saturated section and repeat only as needed.
Clean flux residue according to the flux manufacturer's instructions.
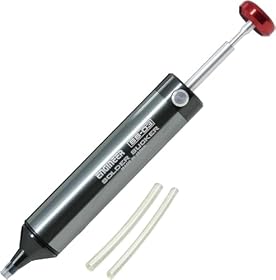
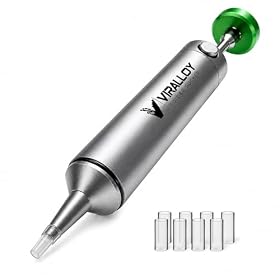
If fresh braid, suitable flux, a properly tinned tip, and adequate heat still do not work, the joint may require a larger tip, wider braid, preheating, or a different desoldering method. For repeated work on large joints, a solder sucker or temperature-controlled desoldering tool may be more practical than braid alone.
FAQ
Why is my desoldering braid not absorbing solder?
The most common causes are oxidized or saturated braid, insufficient flux, a dirty tip, poor contact, low heat, or braid that is the wrong width. Start with a fresh section, add electronics-safe flux, and place a clean, tinned tip directly on top of the braid and joint.
Should I put flux on desoldering wick?
A small amount of rosin-based or no-clean flux made for electronics can improve wicking, especially on old or oxidized solder. Avoid plumbing or acid flux because it can corrode circuit boards.
What temperature should I use for desoldering braid?
Use the soldering station and solder manufacturer's recommendations. Lead-free solder often needs more heat than tin-lead solder, but the appropriate setting depends on the joint, board, tip, and solder alloy. Use the lowest setting that melts the joint reliably.
Can desoldering braid damage a circuit board?
Yes. Excessive heat, pulling braid while it is stuck, or repeatedly working a small pad can lift pads and damage traces. Reheat the braid before lifting it, use adequate flux, and stop if the pad begins to move or discolor.
When should I replace desoldering braid?
Replace it when the working section is saturated with solder, visibly oxidized, contaminated, or no longer wets and absorbs solder after adding flux. Cutting back to a fresh section is usually preferable to trying to restore used braid.