If solder will not melt on your iron, the usual causes are an oxidized or poorly tinned tip, insufficient temperature, poor contact, unsuitable solder, or a failing heating element. Work through these checks in order before replacing the iron.
Solder usually will not melt because the tip is oxidized or not tinned, the iron is not reaching its set temperature, the solder is unsuitable, or heat is not transferring into the joint. Start by checking the tip and solder, then verify the temperature and setup. If a clean, properly tinned tip still cannot melt solder, the tip, cartridge, station, or power supply may need replacement.
1. Check whether the tip is tinned
A dry, dark, rough, or crusty tip transfers heat poorly. Solder may bead up and roll away instead of flowing across the tip.
Try this:
Set the iron to the temperature recommended for your solder and tip.
Wipe the tip briefly on a damp soldering sponge or brass wool.
Immediately apply a small amount of fresh solder to the working surface.
If the solder coats the tip evenly, keep a thin layer of solder on it while working.
Do not leave the tip clean and exposed at operating temperature. The protective coating can oxidize quickly. Avoid filing, sanding, or aggressively scraping a plated tip, since removing the plating can permanently damage it.
If solder will not wet any part of the tip after several attempts, the tip may be badly oxidized, contaminated, or worn out. Replace it with the correct tip for your iron or cartridge system.
2. Confirm that the iron is actually hot
The temperature shown on a station is a setpoint, not proof that the tip has reached that temperature. A loose tip, failed heater, damaged cable, or power problem can leave the iron much cooler than indicated.
Check the following:
The station is switched on and not in standby or sleep mode.
The handpiece is fully seated in its connector.
The tip is installed correctly and pushed fully into position.
The display is not showing an error, fault, or unusually slow warm-up.
The power cord and plug are secure and undamaged.
If the iron has adjustable temperature control, increase it only within the limits recommended by the solder, tip, and component manufacturer. More heat is not always the solution: excessive temperature can burn flux, lift circuit-board pads, damage insulation, and shorten tip life.
If the tip remains cool enough to touch after the normal warm-up period, unplug the unit and stop using it. Do not open a mains-powered station unless you are qualified to service it.
Product prices and availability are accurate as of the date/time indicated and are subject to change. Any price and availability information displayed on Amazon.com at the time of purchase will apply to the purchase of this product.
3. Make sure the solder itself is suitable
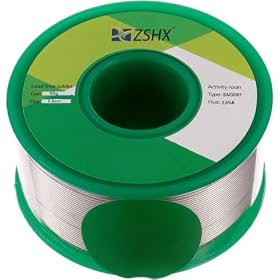
Solder does not all melt at the same temperature. Lead-free solder generally requires more heat than traditional leaded solder, while some specialty solders have different melting ranges.
Check the spool or packaging for:
Solder alloy, such as leaded or lead-free
Diameter
Flux-core or solid solder
Melting or working temperature information
Signs of contamination, corrosion, or age
Solid solder without flux may melt but fail to spread across oxidized surfaces. Flux-core solder is usually easier for ordinary electronics work. Very thick solder also takes more heat to melt than thin solder because more material is in contact with the tip.
Do not assume that a hotter setting will make every solder type suitable for every job. Follow the solder manufacturer’s guidance and use ventilation appropriate for soldering fumes.
Product prices and availability are accurate as of the date/time indicated and are subject to change. Any price and availability information displayed on Amazon.com at the time of purchase will apply to the purchase of this product.
4. Improve heat transfer at the joint
If solder melts on the tip but not on the component or circuit-board joint, the iron may be working correctly. The problem is usually heat transfer, oxidation, contamination, or too much metal mass.
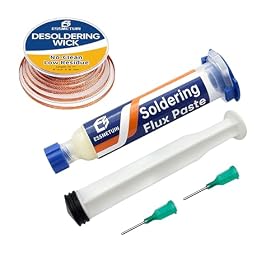
Place the tinned tip so it contacts both the component lead and the pad. Then feed solder into the heated joint—not just onto the tip. A small amount of solder between the tip and joint can create a thermal bridge and help transfer heat.
Allow the joint enough time to heat, but do not hold the iron on a pad indefinitely. If the joint does not heat after a reasonable contact time, check for:
A large ground plane or heavy copper area drawing heat away
A thick wire, connector, tab, or metal chassis needing more thermal capacity
Oxidation, dirt, conformal coating, or old adhesive on the surfaces
A tip that is too small for the work
A damaged or poorly bonded circuit-board pad
For a larger joint, use a clean, tinned tip with more contact area rather than simply turning the temperature far higher. Match the tip shape to the job: a small conical tip may be precise, but a chisel or bevel tip can transfer heat more effectively to larger conductors.
Product prices and availability are accurate as of the date/time indicated and are subject to change. Any price and availability information displayed on Amazon.com at the time of purchase will apply to the purchase of this product.
5. Inspect the tip size and condition
A tip that is too small cannot transfer enough heat to a large joint. A tip that is heavily pitted, cracked, or missing its plating may also fail to accept solder.
Replace the tip if it is:
Permanently black or rough after cleaning
Pitted or visibly damaged
Loose in the handpiece
Unable to hold a coating of solder
The wrong type or size for the iron
Use only compatible replacement tips. Some irons use slide-on tips, while others use cartridges that combine the heater and tip. These parts are not interchangeable across every station.
6. Check for incorrect setup or accessories
A soldering station can appear to work while the setup prevents the tip from heating properly. Verify that:
The correct handpiece is connected to the station.
The tip matches the handpiece and is installed according to the manual.
Any protective cap or shipping material has been removed.
The station is receiving the correct input power.
A foot pedal, temperature lock, or external controller is not limiting operation.
The iron is not resting in a way that activates an unintended sleep or standby feature.
If you are using a USB-powered or battery-powered iron, confirm that the power source can provide the required output. A weak USB charger, unsuitable cable, or depleted battery may prevent the iron from reaching working temperature.
7. Decide whether the iron or station has failed
The iron or station is the likely problem when a compatible, clean tip will not melt the correct solder anywhere—not even when solder is applied directly to the tip—and the unit does not reach its normal operating temperature.
Common hardware faults include a failed heating element, damaged temperature sensor, broken handpiece cable, loose internal connection, or defective control electronics. Some cartridge-style irons may need a cartridge replacement; other units require handpiece or station service.
Unplug the equipment and follow the manufacturer’s troubleshooting and replacement-part instructions. Replace the unit when compatible replacement parts are unavailable, repair costs are disproportionate, or the station shows repeated temperature errors. For mains-powered equipment, have electrical repairs handled by a qualified professional.
Quick diagnosis
Solder melts on the tip but not the joint: improve contact, clean the joint, use flux-core solder, or choose a larger tip.
Solder beads up on the tip: clean and re-tin the tip; replace it if it will not accept solder.
Solder does not melt anywhere: check the setpoint, power, handpiece connection, tip installation, and heating system.
Only large joints are difficult: use a suitable larger tip and allow more heat transfer time without excessive temperature.
The problem began after changing solder: check the alloy and its recommended working temperature.
Keep the tip lightly tinned between joints, clean it only as needed, use fresh solder and suitable flux, and return the iron to its holder when it is not in use. These habits improve heat transfer and help prevent oxidation.
FAQ
Why does solder melt on the tip but not on the circuit board?
The joint may be dirty or oxidized, the tip may not be contacting both surfaces, or the joint may be drawing away more heat than the tip can supply. Clean the joint, add suitable flux, use a tinned tip with more contact area, and heat the pad and lead together.
Why will my soldering iron not melt solder even though it is turned on?
It may not have reached its actual operating temperature. Check the tip installation, handpiece connection, power source, temperature setting, and station error indicators. If a compatible clean tip remains unable to melt solder directly, the heater, sensor, handpiece, or station may be faulty.
Can a bad soldering tip stop solder from melting?
Yes. A badly oxidized, contaminated, pitted, or incorrectly installed tip may not accept solder or transfer heat effectively. Clean and re-tin it; replace it if solder still beads up or will not coat the working surface.
Should I turn the temperature up when solder will not melt?
Only within the solder and equipment manufacturer’s recommended range. First check tip condition, solder type, contact, and power. Excessive heat can damage components, circuit-board pads, flux, and the tip without fixing poor heat transfer.