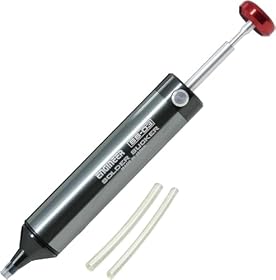
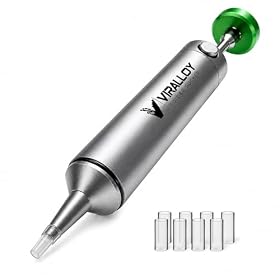
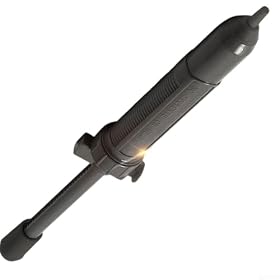
A desoldering pump loses its usefulness when air leaks past the plunger or nozzle. Here’s how to choose one with a reliable seal and how to fix common vacuum problems.
A desoldering pump that actually holds vacuum needs more than a strong spring. The plunger seal, nozzle fit, body, release button, and heat resistance all affect whether it removes molten solder cleanly. Before buying a replacement, check the pump’s seal and nozzle compatibility, then choose a model with serviceable or replaceable parts when possible.
What makes a desoldering pump hold vacuum?
A solder sucker creates vacuum when you press the plunger, place the nozzle over molten solder, and release the spring-loaded mechanism. If air enters through a gap before the solder is pulled away, the pump may sound functional but remove very little solder.
The most important features are:
A tight plunger seal: The piston should move smoothly without feeling loose or allowing air to bypass it.
A well-fitted nozzle: The nozzle must seal reasonably against the joint while still fitting over the solder area.
A heat-resistant nozzle: A nozzle that softens, distorts, or burns at normal desoldering temperatures will quickly lose its seal.
A rigid body: Flexing or cracked plastic can let air leak into the chamber.
A dependable release mechanism: The plunger should latch consistently and release with one press.
Replaceable wear parts: Replacement nozzles, springs, seals, or plungers can make a better pump economical to maintain.
Antistatic construction can also matter when working on sensitive integrated circuits or other static-sensitive electronics. Follow the component and workstation’s ESD precautions rather than relying on the pump alone.
Check these problems before replacing the pump
A pump that no longer holds vacuum may not be completely worn out. Inspect it in this order.
1. Inspect the nozzle
Remove the nozzle and look for a split, melted edge, blocked opening, or solder buildup inside it. A damaged nozzle is one of the most common reasons a solder sucker performs poorly.
Clean only when the pump is cool, and use a nozzle made for that pump. A nozzle that is too loose, too short, or not heat-resistant can leak even if the plunger seal is still good.
2. Check the plunger and seal
With the pump unloaded, press and release the plunger several times. It should travel smoothly and return firmly. A gritty, loose, or uneven stroke may indicate contamination, a worn seal, or a damaged cylinder.
If the design allows access to the seal, inspect it for cracking, flattening, or hardened lubricant. Do not add oil unless the manufacturer specifically permits it; oil can contaminate circuit boards and may damage some seals.
3. Look for cracks and loose connections
Examine the body, nozzle socket, end cap, and release-button area. Small cracks may be difficult to see but can prevent the chamber from developing useful suction. Tighten only parts intended to be tightened, since forcing a plastic body or threaded fitting can create another leak.
4. Clear solder from the passage
A partial blockage can make a pump seem weak. Let the tool cool, remove the nozzle if possible, and clear loose solder according to the manufacturer’s instructions. Never force a sharp object through a hot nozzle toward your hand or another person.
5. Confirm the technique and setup
Heat the joint until the solder is fully molten, then place the nozzle close to—but not aggressively against—the joint. Release the plunger while the solder is liquid. If you trigger the pump too early, it may pull air without removing solder.
Use a tip size and temperature appropriate for the joint and board. Excessive heat can lift pads or damage insulation, while insufficient heat leaves solder too viscous to move.
Product prices and availability are accurate as of the date/time indicated and are subject to change. Any price and availability information displayed on Amazon.com at the time of purchase will apply to the purchase of this product.
Specifications that matter when buying
Nozzle size and material
A narrow nozzle can reach crowded joints, while a wider opening can remove more solder from larger through-hole connections. The best choice depends on the work rather than the largest possible opening.
Look for heat-resistant nozzle material and readily available replacement nozzles. A pump with an unusual or nonreplaceable nozzle may be difficult to maintain.
Seal and serviceability
The seal is more important than a dramatic spring action. Look for a pump with a reputation for a smooth plunger, a solid chamber, and replacement seals or internal parts if those are offered by the manufacturer.
A rebuildable design is particularly useful for frequent repair work. For occasional hobby use, a simple pump may be adequate if its nozzle and plunger are easy to replace.
Capacity and body length
A larger chamber can collect more solder before it needs to be emptied, but a longer or heavier pump may be awkward around dense circuit boards. Choose a size you can hold steadily while keeping the heated iron and pump under control.
One-handed operation
A one-handed trigger can leave the other hand available for the soldering iron or board support. This is convenient, but the trigger must be easy to operate without bumping nearby components. If the release button is stiff or poorly positioned, a simpler pump may be easier to use accurately.
ESD considerations
For static-sensitive electronics, check whether the tool is intended for ESD-controlled work and use it within a properly grounded ESD setup. “Antistatic” labeling does not replace safe handling, grounding, and storage procedures.
Product prices and availability are accurate as of the date/time indicated and are subject to change. Any price and availability information displayed on Amazon.com at the time of purchase will apply to the purchase of this product.
How to get better results from a good pump
Add fresh solder to an old or oxidized joint if it will not melt evenly. This can improve heat transfer.
Apply the iron until the solder is completely liquid.
Keep the pump nearby and position the nozzle without dragging it across the pad.
Release the plunger in one motion.
Remove the pump and iron carefully, then inspect the joint.
Repeat only as needed; prolonged heating can damage pads and nearby parts.
For large ground connections or stubborn joints, a powered desoldering tool or desoldering braid may be more suitable than a manual pump. Braid is also useful for removing the thin solder film left after a pump clears most of a through-hole joint.
When replacement is the sensible choice
Replace the nozzle when it is cracked, melted, blocked beyond cleaning, or no longer seals around the joint. Replace the pump or its internal seal when the body is cracked, the plunger remains loose after cleaning, or the release mechanism fails repeatedly.
If replacement parts are unavailable and the tool cannot hold vacuum with a clean, properly fitted nozzle, replacing the entire pump is usually more practical than trying to modify the chamber. Do not repair a damaged electrical soldering tool with improvised parts near heat or mains voltage.
Bottom line
A reliable desoldering pump depends on an airtight plunger and a heat-resistant nozzle that fits correctly. Prioritize seal quality, nozzle availability, smooth one-handed operation, and serviceable parts over maximum chamber size or spring force. If the pump still leaks after the nozzle and seal checks, replacement is the safer and more dependable solution.
FAQ
Why does my desoldering pump have suction but not remove solder?
The nozzle may not be sealing against the joint, the solder may not be fully molten, or the nozzle passage may be partly blocked. Check the nozzle first, then heat the joint thoroughly and release the plunger while the solder is liquid.
Can I replace the seal in a desoldering pump?
Some pumps have replaceable plungers, seals, or internal parts, while others are not designed to be serviced. Check the manufacturer’s parts information before opening the tool or applying lubricant.
Is a larger desoldering pump always better?
No. A larger chamber may collect more solder, but it can be heavier and less convenient around crowded boards. Seal quality, nozzle fit, and controllable operation usually matter more.
Should I use solder wick instead of a desoldering pump?
They serve different purposes. A pump is often efficient for clearing molten solder from through-hole joints, while solder wick is useful for removing residual solder and working on flatter surface-mount areas.