Tip Oxidizing After a Few Sessions: Causes and Fixes
A soldering tip that turns dark, stops wetting, or develops a rough surface after a few sessions is usually being overheated, cleaned too aggressively, or left un-tinned. Check the tip, solder, flux, temperature, and storage before assuming the iron itself has failed.
Tip oxidizing after a few sessions
A soldering tip that oxidizes after only a few sessions is usually affected by excessive heat, insufficient tinning, aggressive cleaning, or unsuitable solder and flux. Start by checking the tip condition and temperature setting, then review your cleaning and storage routine. If the tip has deep pits, flakes, or no longer accepts solder after proper care, replacement is normally more practical than trying to restore it.
What tip oxidation looks like
Common signs include:
A dull gray, brown, or black surface
Solder forming a ball instead of coating the tip
Poor heat transfer to the joint
Dry-looking joints even when the iron is hot
Pitting, cracking, or flaking on the plated surface
A tip that needs frequent wiping but will not stay tinned
Some discoloration is normal during use. The more important question is whether solder still wets the working area. A tip with light discoloration can often be recovered; a heavily pitted or damaged tip generally cannot.
Check the tip and consumables first
1. Confirm the tip is the correct type and size
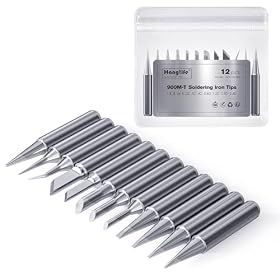
Use a tip intended for your soldering iron or station. An incorrect or poorly fitting tip may heat unevenly, sit loosely, or fail to transfer heat efficiently. Avoid filing, sanding, or scraping the working surface. Most modern tips have a plated working layer that can be permanently damaged by abrasives.
A tip that is too small for the work may also encourage you to raise the temperature unnecessarily. Choose a tip with enough contact area for the joint while still fitting the component spacing.
2. Check the solder
Solder helps protect a hot tip by keeping it coated. If the solder will not wet the tip, check that it is suitable for the work and has usable flux inside the core when using flux-cored solder.
Old, contaminated, or poorly stored solder may not perform well. Lead-free solder can also require more careful temperature control and tip maintenance than traditional leaded solder. Follow the solder manufacturer's guidance rather than automatically increasing the iron to its maximum setting.
3. Check the flux
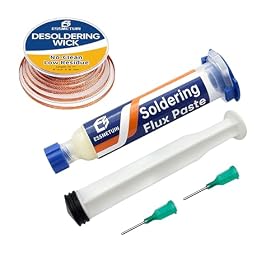
Flux that is exhausted, incompatible, or left as a corrosive residue can contribute to tip damage. Use electronics flux intended for soldering circuit boards, and avoid plumbing flux unless the product is specifically approved for electronics work. Clean residue according to the flux manufacturer's instructions.
More flux is not always better. Excessive flux can create smoke, residue, and contamination without solving poor wetting caused by an overheated or damaged tip.
Product prices and availability are accurate as of the date/time indicated and are subject to change. Any price and availability information displayed on Amazon.com at the time of purchase will apply to the purchase of this product.
Reduce the main causes of oxidation
Lower the temperature when practical
Excessive temperature rapidly burns away flux and accelerates oxidation. Set the iron only as hot as needed to heat the joint efficiently. The right setting depends on the solder type, joint size, board design, tip shape, and thermal mass.
If the joint takes too long to heat, do not immediately solve the problem by selecting the highest temperature. First try a properly sized tip, fresh solder, and clean surfaces. A larger chisel or bevel tip often transfers heat more effectively than a very fine pointed tip.
Do not leave the iron at operating temperature while idle for long periods. Use the station's sleep or standby function if available, or turn it off during extended pauses.
Keep the tip tinned
Before soldering, melt a small amount of solder onto the working surface. During work, add solder whenever the surface begins to look dry. Before switching the iron off, coat the tip with a protective layer of solder and let it cool according to the manufacturer's instructions.
Do not leave the tip completely bare while hot. A thin layer of solder limits contact between the hot plating and air.
Clean gently
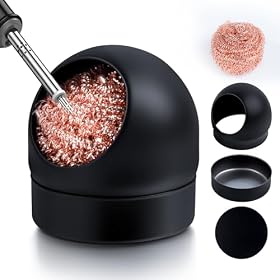
Use the cleaning method recommended for the tip and iron. Brass or brass-plated wool generally removes residue while leaving a small amount of solder on the tip. A damp sponge can also be suitable, but repeatedly wiping a very hot tip across a wet sponge causes rapid temperature changes and can remove protective solder.
Avoid steel wool, files, knives, sandpaper, and aggressive scraping. These can remove the plating and expose the copper core, after which the tip may dissolve quickly into solder.
Clean only when needed. A tip does not need to look mirror-bright to work properly; it needs a smooth, solder-wet working surface.
Product prices and availability are accurate as of the date/time indicated and are subject to change. Any price and availability information displayed on Amazon.com at the time of purchase will apply to the purchase of this product.
Check setup and storage
Avoid contamination
Do not touch the working surface with fingers, oily tools, dirty tweezers, or contaminated wire. Keep the stand and cleaning material reasonably clean, and replace heavily contaminated brass wool or sponges.
When working on a board, make sure the copper pads and component leads are free of oxidation and contamination. Dirty workpieces can make the tip appear to be the problem because solder repeatedly fails to wet the joint.
Store the iron correctly
When the iron is switched off, leave the tip tinned rather than bare. Use the stand supplied or approved for the iron, and keep the hot tip away from plastic, wood, cables, and other flammable materials. Do not remove or install a tip while it is hot unless the manufacturer specifically permits that procedure.
If the iron will be stored for a long time, follow the manufacturer's instructions for tip preparation and storage. Some systems require a protective coating or a particular replacement procedure.
Product prices and availability are accurate as of the date/time indicated and are subject to change. Any price and availability information displayed on Amazon.com at the time of purchase will apply to the purchase of this product.
When the tip is beyond recovery
Replace the tip if it has deep pits, exposed copper, severe flaking, a distorted shape, or a surface that will not accept solder after gentle cleaning and fresh tinning. Continuing to use a badly damaged tip can make joints less reliable and may tempt you to use excessive heat.
Replace the tip with the same compatible series and size specified for the iron or station. If several tips oxidize unusually quickly, the problem may be the temperature control, tip fit, solder, flux, or cleaning method rather than the individual tip.
Product prices and availability are accurate as of the date/time indicated and are subject to change. Any price and availability information displayed on Amazon.com at the time of purchase will apply to the purchase of this product.
When to suspect the soldering iron or station
Inspect the iron or station only after checking the consumables and technique. Possible warning signs include:
The tip becomes much hotter than the selected setting appears to require
The handle, cord, connector, or heater shows damage
Multiple compatible tips fail quickly despite correct tinning and cleaning
Unplug the equipment before inspecting connectors or changing parts, and do not open a mains-powered station unless you are qualified to do so. Follow the manufacturer's service guidance or have the unit checked by a qualified technician. If replacement tips cost more than a reasonable repair or the station has additional electrical faults, replacing the iron or station may be the sensible next step.
A simple prevention routine
Select a compatible tip with enough contact area for the joint.
Use suitable electronics solder and flux.
Set the lowest temperature that heats the joint efficiently.
Keep the working area lightly tinned while soldering.
Clean with brass wool or the approved method, without abrasives.
Use sleep or standby mode during pauses.
Tin the tip before shutdown and replace it when the plating is damaged.
If oxidation returns after following this routine, compare the solder and flux with the iron manufacturer's recommendations and check whether the station is regulating temperature correctly.
FAQ
Can an oxidized soldering tip be cleaned?
Light oxidation can often be reduced by gently cleaning the hot tip and applying fresh solder. Do not file or sand it. If the tip is pitted, flaking, or will not accept solder, replace it.
Why does my soldering tip turn black so quickly?
Common causes include excessive temperature, leaving the tip bare while hot, burned or unsuitable flux, aggressive cleaning, and contamination. Check these before blaming the soldering iron.
Is a black soldering tip ruined?
Not necessarily. Color alone does not determine whether a tip is usable. If solder still wets the working surface and the plating is smooth, it may continue to work. Deep pitting, exposed copper, or persistent poor wetting indicates replacement.
Should I use a wet sponge or brass wool?
Either may be suitable if approved for your tip system. Brass wool generally causes less thermal shock and leaves more solder on the tip, while a damp sponge can cool the tip quickly. Follow the iron and tip manufacturer's guidance.
Can high temperature permanently damage a soldering tip?
Yes. Excessive heat can accelerate oxidation, burn away flux, and shorten the life of the plating. Use the lowest setting that heats the joint effectively and avoid leaving the iron hot while idle.